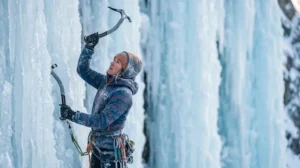
In summary:
- Rock climbing strength and technique do not directly transfer to ice; success requires systematically unlearning habits and rebuilding skills from the ground up.
- Mastery begins with footwork. Precise crampon placement and body positioning are more critical than upper-body strength and swinging an ice tool.
- A disciplined progression is non-negotiable: start with indoor dry-tooling to build tool trust, then move to outdoor top-roping before ever considering leading on ice.
- Your first gear investment should be in personal fit items like boots and gloves; rent technical hardware like tools and crampons to find what works for you.
- Verifying a guide’s certification (e.g., AMGA/IFMGA) is an absolute safety imperative, as there is no federal requirement for guide training in the U.S.
For a seasoned rock climber, the sight of a frozen waterfall presents an irresistible new challenge. The same vertical world, just a different medium. The confidence gained from crimping on granite or limestone feels transferable; after all, climbing is climbing. You have the strength, the movement vocabulary, and the mental fortitude. However, this assumption is not just flawed—it’s dangerous. The physics, techniques, and consequences of ice climbing operate under a completely different set of rules.
Most beginners, especially those from a rock background, fixate on the ice tools and the heroic swing. They believe the path to ascent is through upper body power. This is the first and most critical mistake. Ice climbing is a discipline of the feet, a testament to precision, and an exercise in energy conservation. Applying rock climbing’s dynamic, powerful movements to a fragile and unforgiving medium like ice often leads to insecure placements, wasted energy, and a significantly higher potential for catastrophic failure.
The true key to tackling frozen waterfalls safely is not to extend your rock-climbing skills, but to deconstruct them entirely. It requires a zero-ego approach and a systematic rebuilding of your “climbing OS” with a new foundation. This process is methodical, deliberate, and begins far from any actual ice. It starts with learning to trust a new set of tools and, most importantly, relearning how to use your feet as your primary source of security and propulsion.
This guide provides that systematic framework. We will dismantle the core differences between rock and ice, outline a structured training progression from the gym to the glacier, detail the essential equipment philosophy, and pinpoint the critical techniques and safety protocols that define competent ice climbers. Follow this path, and you’ll build the authentic confidence needed to ascend frozen water, not just muscle your way up it.
Contents: Your Path from Rock to Ice
- Why Doesn’t Rock Climbing Experience Prepare You for Ice Climbing Challenges?
- How to Learn Ice Climbing Fundamentals Before Tackling Frozen Waterfalls?
- What Equipment Do You Need for Your First Ice Climbing Attempts?
- The Crampon Technique Error That Causes 60% of Ice Climbing Falls
- How to Build Ice Climbing Confidence on Indoor Walls Before Real Ice?
- What Certifications Should Adventure Guides Hold for High-Altitude Treks?
- How to Select Trekking Boots for Rocky and Uneven Ground?
- Why Do 85% of Adventure Accidents Involve Unqualified Guides?
Why Doesn’t Rock Climbing Experience Prepare You for Ice Climbing Challenges?
The transition from rock to ice is a lesson in humility. While rock climbing builds physical strength and mental resilience, it ingrains movement patterns that are counterproductive on ice. Rock climbing is a conversation with a solid, predictable surface. Ice climbing is a negotiation with a fragile, ephemeral one. The fundamental difference lies in the consequence of a fall. On a bolted sport route, a fall is often a routine part of the process. On ice, it’s an event to be avoided at all costs. The gear that protects you can also become a hazard, and the surface you are climbing is inherently less stable.
This stark reality changes everything about risk calculation. As professional ice climber Will Gadd bluntly states, “You’ve got about 50 percent odds of injuring or killing yourself if you fall off.” This isn’t to create fear, but to instill the requisite respect for the medium. Unlike rock, where you pull *on* holds, on ice, you create your own holds with every swing and kick. A poorly placed tool or crampon isn’t just a failed move; it’s a structural failure in your connection to the wall. This requires a complete mental recalibration, shifting from a mindset of physical problem-solving to one of meticulous construction and absolute security with every move.
This journey of unlearning is a universal experience for climbers making the switch. The process teaches lessons that go beyond pure technique, demanding a new level of patience and self-awareness. One climber, reflecting on their progression, perfectly captured this sentiment:
Ice climbing has taught me a lot of things. Patience. Humility. It’s shown me that progress isn’t a straight line. Like ice, it melts and refreezes.
– A Converted Rock Climber, Climbing Magazine
Your rock experience gives you a head start in understanding ropes and vertical movement, but the application is entirely different. You must learn to move with a quiet, deliberate grace, trusting your feet and making every placement a conscious, secure act.
How to Learn Ice Climbing Fundamentals Before Tackling Frozen Waterfalls?
The path to competent ice climbing is not a weekend affair; it is a structured, phase-based progression that builds skills and trust systematically. The goal is to develop comfort and proficiency in a controlled environment before introducing the objective hazards of real ice. This journey begins indoors, not on a frozen flow. The modern framework for this is a progression from dry-tooling (climbing rock or artificial surfaces with ice tools) to top-roping on real ice, and only then, after significant mileage, to lead climbing.
This progression is built on core principles of physical training, namely specificity and progressive overload. You isolate and master one skill before adding the complexity of the next. It is a discipline that rewards patience and punishes impatience. The framework ensures that by the time you are swinging tools into a real waterfall, the movements are second nature, and your focus can be on reading the ice and managing risk, not fumbling with your gear.
This visual journey from the controlled gym environment to the vast alpine world underscores the scale of progression required. A successful framework breaks this journey down into manageable stages with clear milestones. Before ever touching ice, you must prove your competence on artificial terrain. According to a widely accepted progression model, a key initial goal is to confidently top-rope a D4-graded dry-tooling route indoors before moving on. This disciplined approach consists of several key phases:
- Stage 1: Tool Trust and Static Drills. Begin in a controlled environment like a climbing gym with a designated dry-tooling section. Focus on static hangs from your tools (‘Tool Hangs’) to build trust in the gear. Practice the ‘Silent Tools’ drill, where you place and remove your tools from holds without making any noise, forcing precision and control.
- Stage 2: Foundational Movement. Once comfortable, begin top-roping easy dry-tooling routes. Here, you master foundational movements and begin to integrate footwork with tool placements. Your goal is to achieve the D4 top-rope milestone.
- Stage 3: Building Strength and Leading. Introduce dynamic strength exercises like Lock-Offs and Hanging Leg Raises. Begin leading easy, well-protected dry-tooling routes indoors to practice the mental game of climbing above your protection.
- Stage 4: Transition to Ice. Only after cleanly leading a D5 dry-tooling route indoors should you seek your initial outdoor top-rope experience on real, low-angle ice with a qualified instructor.
What Equipment Do You Need for Your First Ice Climbing Attempts?
Unlike rock climbing where you can start with a simple pair of shoes and a chalk bag, ice climbing is inherently gear-intensive. The sheer volume of sharp, technical equipment can be intimidating and expensive. The single most important piece of advice for a beginner is this: do not build your initial gear list in isolation. Your first foray into the sport should be with a qualified guide, an experienced mentor, or through a formal course. This not only ensures your safety but also provides the invaluable opportunity to try different types of gear before you buy.
The philosophy for acquiring gear should be “rent first, buy personal fit items second.” Technical hardware like ice tools and crampons have different swing weights, angles, and features. Using rental gear allows you to discover your personal preferences. However, items that depend on a perfect fit for comfort and performance—namely boots and gloves—are where your first purchases should be focused. A poorly fitting boot can ruin a day and lead to dangerous footwork, while inadequate gloves can result in cold, useless hands.
As this close-up of the essential hardware reveals, ice climbing gear is specialized and unforgiving. Your decision-making process for acquiring it should be just as precise. A structured approach to gearing up is essential. One of the best strategies is to follow a rent-first decision checklist for beginner ice climbers, which prioritizes experience over immediate ownership. The core tenets are:
- Go with a Guide First: Never assemble your kit based on online reviews alone. An instructor will teach you how to use the gear properly and allow you to test their equipment.
- Rent Technical Hardware: Always rent boots, crampons, and ice tools for your first few outings. This is the most effective way to learn what you like before making a significant financial commitment.
- Buy Personal Fit Items: Your first purchases should be mountaineering boots that fit perfectly, a quality layering system, and a few different pairs of gloves for varying conditions. These have the biggest impact on personal comfort and safety.
- Delay Protection Purchases: Items like ice screws and the gear for building V-thread anchors are advanced. Wait to purchase these until you have completed a lead-climbing course and have a clear understanding of your climbing objectives.
The Crampon Technique Error That Causes 60% of Ice Climbing Falls
For beginners, the ice tool is a symbol of power and progress. The satisfying *thwack* of a good placement feels like the essence of the sport. Consequently, they invest enormous mental and physical energy into perfecting their swing. While a good swing is important, this hyper-focus on the upper body is dangerously misplaced. The vast majority of beginner falls and near-misses on low to moderately-angled ice are not caused by a failed tool placement, but by a catastrophic failure of footwork. The error is kicking the crampons too hard and with poor precision.
Rock climbers are used to using their feet to push off holds. On ice, you must kick to *create* the hold. A common mistake is to swing the leg wildly and drive the crampon in with excessive force, as if hammering a nail. This does three negative things: it shatters the ice, wastes a tremendous amount of energy, and often results in an insecure placement where only the secondary points of the crampon are engaged. A secure crampon placement is a subtle, precise art. It’s about engaging the front points with a deliberate, well-aimed kick, just hard enough to penetrate the solid ice beneath the brittle surface layer. The ankle should be flexed, and the heel dropped to ensure the points bite at the correct angle.
Good technique is a matter of finesse, not force. A relaxed grip and a focus on stable, well-placed feet form the foundation of secure upward movement. As the experts at Unlevel Edge note, this is a common blind spot for newcomers:
Beginners often focus on swinging hard, but good technique is more about accurate placements, relaxed grip and stable feet.
– Unlevel Edge, Ice Climbing Gear Guide
To correct this, practice the “silent feet” drill. On low-angle ice, try to place your crampons with minimal noise and without shattering any surface ice. Focus on making all four front points of your two crampons level, creating a stable, robust platform. From this solid base, you can stand up, reach higher for your next tool placement, and maintain a state of balance and control. Mastering this foundation is the fastest way to progress safely.
How to Build Ice Climbing Confidence on Indoor Walls Before Real Ice?
The safest and most effective way to build the foundational skills for ice climbing is through dry-tooling. This discipline involves using your ice tools and crampons (or rock shoes) to climb on rock or, more commonly, on specially designed indoor climbing walls. It allows you to develop the most crucial element—trust in your tools—without the added complexities and objective dangers of cold temperatures, brittle ice, and avalanche risk. The gym provides a controlled environment to hard-wire the unique movement patterns of climbing with sharp metal implements.
Indoor dry-tooling routes are specifically set with holds that mimic the types of placements you’ll find on ice and mixed terrain. This is where you learn the art of the “stein pull” (using a tool in an undercling or side-pull slot and torquing it for stability) and the dynamic “figure-four” move. These techniques are central to modern ice and mixed climbing. The experience of hanging your full body weight from the tiny tip of a pick on a small wooden or plastic hold is a profound lesson in trust and precision. It teaches you that a placement’s security comes from the angle and the direction of the pull, not from brute force.
This indoor practice is the critical threshold you must cross before venturing outside. The core principle of this training is learning to generate force from your core and legs, not just your arms. As legendary Swiss climber and coach Peter von Känel explains, power comes from the entire body working as a system:
The thrust for locomotion comes from the legs (push open) and from the trunk (turn in).
– Peter von Känel, Lacrux
To directly prepare for on-ice scenarios, focus on specific dry-tooling drills that mirror real-world movements. International competitions, often held on artificial surfaces, have pushed the development of these highly transferable skills. Your training should include:
- Stein Pulls and Figure-Fours: These are not just competition moves; they are essential techniques for navigating complex terrain. Practice them on safe, top-roped routes to understand the body positioning required.
- Leashless Tool Matching: Modern technique and safety regulations, such as the prohibition of leashes in competition, emphasize the ability to swap hands on a single tool. Practice matching hands on holds to build stability and fluidity.
- Silent Placements: As with your feet, practice placing your tools quietly and precisely. This forces you to read the hold and place the pick correctly on the first try, conserving energy and building confidence.
What Certifications Should Adventure Guides Hold for High-Altitude Treks?
When you transition from the gym to the mountains, your most important piece of safety equipment is the person you choose to learn from. In the world of technical mountain sports like ice climbing, a guide’s experience and certification are not just resume builders; they are direct indicators of their ability to manage risk and provide high-quality instruction. For climbers in North America, the gold standard is certification through the American Mountain Guides Association (AMGA), which is a member of the International Federation of Mountain Guides Associations (IFMGA).
The AMGA provides a rigorous, multi-year training and assessment pathway that produces guides competent in three disciplines: rock, alpine, and ski. For ice climbing specifically, the relevant certification is the AMGA Ice Instructor. This is not a weekend course. It is the culmination of years of personal climbing, training, and assessment. The process is designed to ensure a guide is proficient in guiding technical, multi-pitch waterfall ice, alpine ice, and mixed climbing conditions with clients. The prerequisites alone are daunting, requiring candidates to have led a significant number of difficult ice climbs (WI 4+ or harder) and have extensive experience guiding on multi-pitch routes.
The reason this certification is so critical is a sobering fact about guiding in the United States. As the AMGA itself points out, “a guide is not required by federal law to be trained in any way before guiding the public.” This regulatory vacuum makes it the client’s responsibility to verify a guide’s qualifications. Hiring an uncertified guide is a gamble you cannot afford to take. The full AMGA/IFMGA certification track represents a massive investment, often taking 5–12 years and costing between $45,000–$75,000+. This commitment is a clear proxy for a guide’s dedication to their profession and your safety.
Action Plan: Auditing Your Ice Climbing Guide’s Credentials
- Points of Contact: Directly ask the guide or their company for their specific AMGA or equivalent IFMGA certification level (e.g., “Are you an AMGA Certified Ice Instructor?”). Vague answers are a red flag.
- Collecte: Go to the official AMGA “Hire a Guide” website and verify their name and certification status. Inventory their stated experience against the program’s public requirements.
- Cohérence: Ensure the trips they offer are within their certified Scope of Practice. A guide certified for single-pitch ice should not be guiding complex multi-pitch alpine routes.
- Mémorabilité/Émotion: Seek out reviews and testimonials from past clients. Look for comments that specifically mention their teaching style, risk management, and professionalism, not just that the trip was “fun.”
- Plan d’intégration: Politely decline to book with any individual or company that cannot or will not provide clear, verifiable proof of certification. Prioritize those who are transparent about their qualifications.
How to Select Trekking Boots for Rocky and Uneven Ground?
While the title mentions trekking boots, for ice climbing, the conversation must elevate to a more specialized category: mountaineering boots. A standard hiking or trekking boot lacks the two critical features required for ice climbing: a rigid sole and crampon compatibility. A stiff sole is non-negotiable. It provides the stable, unbending platform needed to support your entire body weight on the tiny front points of your crampons. Trying to ice climb in flexible boots is not only exhausting but also extremely dangerous, as the boot flex can cause the crampons to pop off.
The second critical feature is the boot’s system for attaching crampons. This compatibility is what truly defines a mountaineering boot. There are several types of attachment systems, and your boot choice will dictate what kind of crampon you can use. For beginners, the most important factor is finding a boot that fits perfectly, as even the best boot is useless if it causes blisters or cuts off circulation. Modern single-layer leather or synthetic boots are often sufficient and more comfortable for beginner and single-day ice climbing than heavy, plastic double boots, which are designed for extreme cold and high-altitude expeditions.
Understanding the interplay between boots and crampons is crucial. The table below, based on an essential equipment checklist for ice climbing, breaks down the main attachment systems. For a beginner without dedicated mountaineering boots, the “Strap-On” system is the most versatile starting point.
| System | Boot Compatibility | Best For |
|---|---|---|
| Strap-On | Nearly any boot, including approach or hiking boots | Beginners without dedicated mountaineering boots |
| Semi-Automatic | Boots with a heel welt/lip | Climbers with intermediate boots transitioning to technical ice |
| Automatic (Step-In) | Rigid boots with front and heel welts | Dedicated ice climbers on vertical waterfall ice |
Your first pair of boots is a significant investment. Always try them on in-store with the type of thick sock you’ll be wearing. Ensure there’s enough room to wiggle your toes (to prevent frostbite) but no heel lift when you walk (to prevent blisters and provide climbing precision). This single piece of gear forms the true foundation of your entire climbing system.
Key Takeaways
- Ice climbing is a discipline of precision, not power. Your rock-climbing habits must be systematically unlearned and replaced with techniques founded on footwork and balance.
- A structured, non-negotiable progression is essential for safety: master tool-handling in a gym (dry-tooling), then practice on outdoor top-ropes with an instructor before ever attempting to lead climb on ice.
- Your personal safety is your responsibility. This means rigorously verifying a guide’s credentials (AMGA/IFMGA) and building your own habits of risk management, from layering properly to staying fueled.
Why Do 85% of Adventure Accidents Involve Unqualified Guides?
The statistic that a high percentage of accidents involve unqualified guides, while often cited, points to a larger, more fundamental truth in adventure sports: the ultimate responsibility for safety rests with the individual. While hiring a certified guide is the most critical step in mitigating risk, it does not absolve you of the need to build your own personal safety system. Competence in the mountains is a combination of technical skill, sound judgment, and a set of deeply ingrained personal habits that keep you warm, dry, and fueled.
Proper preparation is paramount. As Wyoming Mountain Guides emphasize, this preparation goes a long way in making winter climbing more enjoyable and, more importantly, safer for everyone. This personal system is not about complex technical skills but about mastering the basics of self-care in a harsh environment. It involves a constant, forward-looking assessment of your body and the conditions. You must learn to “dress for the next 15 minutes,” anticipating whether you’ll be working hard and sweating on the approach or standing still and freezing at a belay.
The foundational pillars of this personal safety system are simple but non-negotiable. Mastering them is as important as mastering your crampon technique.
- Stay Dry: Sweat is your enemy in winter. It wets your base layers, and when you stop moving, that moisture freezes. Learn to manage your layers proactively. Strip down for the approach, even if you feel cold at the car. Climb in your mid-layers, and immediately put on a warm belay jacket the moment you stop climbing.
- Stay Fueled: Your body is a furnace that requires constant fuel to stay warm. Cold-weather activities burn a massive number of calories. Eat a large meal before you go, snack frequently throughout the day, and carry a thermos with a hot, sugary drink. Refuel immediately after you finish climbing to aid recovery.
- Stay Aware: Pay attention to your own body and your partners. Are your fingers getting numb? Are you feeling sluggish or “bonking”? Are your partners shivering? Speak up early. Small problems, if ignored, can quickly escalate into serious situations in a winter environment.
This mindset of proactive self-management is what separates experienced mountaineers from novices. A guide can lead you up the ice, but they cannot keep you warm or force you to eat. That responsibility is yours alone.
To begin your journey safely, the next logical step is to seek out a certified guide or a structured course to translate this knowledge into practice. Use the principles in this guide to ask the right questions, choose the right program, and start building your skills on a solid, safe foundation.