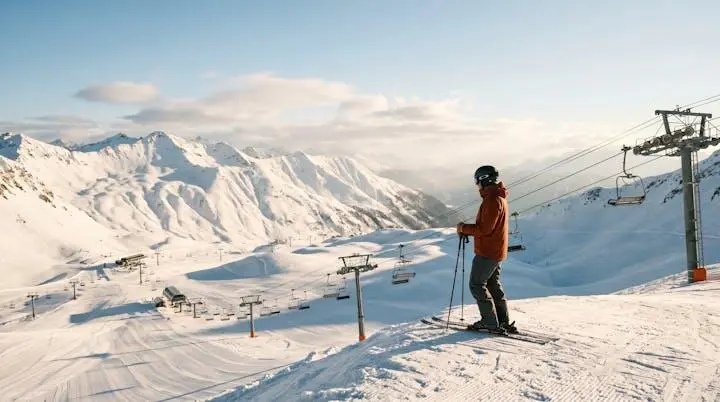
In summary:
- Treat the ski resort as a transportation grid, not a playground. The key to more skiing is optimising your uphill travel.
- Focus on a lift’s “uphill capacity” (VTFH), not just its speed. A slow six-person chair often moves more people than a fast, low-capacity tram.
- Divide the resort map into “terrain pods”—zones served by one or two lifts—and master one pod at a time before linking them.
- Avoid the “midday migration” to on-mountain restaurants between 11 AM and 1 PM, which clogs central lifts. Ski during this window and eat at off-peak times.
- Use real-time resort app data to spot when popular lifts reopen after wind holds or when predictive wait times drop, giving you a strategic advantage.
The single greatest source of frustration on a ski holiday isn’t the weather or the snow conditions; it’s the time lost. You spend a small fortune on a lift pass, only to feel like half your day is spent shuffling forward in a crowded lift queue. The common advice is predictable: “ski during lunch,” “avoid the main base area,” or “just follow the sun.” While not wrong, these tips only scratch the surface. They are tactical reactions, not a cohesive strategy for mastering the mountain.
The true bottleneck to maximising your slope time is not understanding the mountain as a complex transportation system. Most skiers see a map of runs; an operations expert sees a grid of arteries and choke points, of capacity and flow dynamics. The secret to doubling your time on the snow isn’t about skiing faster—it’s about thinking like the person who designed the lift network. It’s about understanding the physics of uphill capacity, the psychology of crowd movement, and the geographical logic of the terrain.
This guide will shift your perspective. We will deconstruct the ski resort map, moving beyond the simple colour-coding of trails. You will learn to evaluate a lift’s true efficiency, identify natural “terrain pods” to conquer the mountain methodically, and anticipate the daily ebb and flow of crowds. By adopting an operator’s mindset, you can transform your ski day from a reactive struggle against queues into a proactive, strategic session that yields more vertical feet and far less frustration.
Summary: Mastering the Mountain’s Grid: An Operator’s Guide to Efficient Skiing
- Why Does Understanding Lift Capacity Double Your Skiing Time per Day?
- How to Read Ski Resort Maps to Plan the Most Efficient Lift Routes?
- Gondola vs Chairlift vs Drag Lift: Which Gets You Skiing Fastest?
- The Peak Time Mistake That Wastes 90 Minutes in Lift Queues Daily
- When Should You Hit Popular Lifts to Avoid 30-Minute Wait Times?
- How to Plan Your Open-Top Bus Route to Cover 15+ Landmarks in One Day?
- How to Choose Cruise Itineraries That Cover Must-See Regional Highlights?
- Does Ski-In/Ski-Out Access Justify Paying 40% More for Accommodation?
Why Does Understanding Lift Capacity Double Your Skiing Time per Day?
The most common mistake skiers make is judging a lift by its speed. A fast-moving bubble chair feels efficient, but it’s often a deceptive metric. The true measure of a lift’s ability to clear a queue and get you up the mountain for another lap is its uphill capacity. This is typically measured in People Per Hour (PPH) but is even more accurately captured by a metric called Vertical Transport Feet per Hour (VTFH), which combines PPH with the vertical feet the lift climbs.
A lift’s design capacity is a function of how many people a carrier holds and the loading interval, not its rope speed. For example, a modern six-person chairlift (“six-pack”) on a six-second interval can move 3,600 people per hour. A high-speed quad on the same interval moves 2,400. This is the engine of the resort. Understanding which lifts are the “workhorses” is paramount. A slower, older, fixed-grip triple chair in a less-trafficked area might offer far more skiing than a flashy new gondola that serves as a bottleneck for thousands of skiers trying to access the same peak.
Case Study: The Deceptive Efficiency of the Jackson Hole Tram
The legendary Jackson Hole tram boasts a massive vertical rise of over 4,000 feet, but its low capacity means its VTFH score is a mere 2,654,600, placing it outside the top 400 most efficient lifts. In stark contrast, Jackson’s Bridger Gondola, while climbing a shorter vertical of 2,730 feet, can move 2,400 passengers per hour. This makes the gondola the far superior workhorse for skiers looking to log multiple laps, while the tram is a “destination” lift for a single, iconic descent. This perfectly illustrates how focusing on a lift’s true uphill capacity, as the industry’s Vertical Transport Feet Per Hour rankings show, is crucial for planning an efficient day.
Before you even click into your bindings, a quick analysis of the map can reveal these workhorses. Look for the high-capacity six-packs and eight-person chairs that serve a variety of terrain. These are your primary tools for accumulating vertical feet. The low-capacity Poma lifts or iconic trams might be fun for a one-off experience, but they are not the foundation of a high-mileage ski day.
How to Read Ski Resort Maps to Plan the Most Efficient Lift Routes?
Looking at a full resort map can be overwhelming. It’s a spiderweb of lines that encourages chaotic, inefficient movement across the mountain. The strategic approach is to mentally break the map down into a series of interconnected “terrain pods.” A terrain pod is a distinct section of the mountain—a bowl, a face, or a series of gullies—primarily served by a single lift or a small group of lifts. By focusing on one pod at a time, you reduce travel time and learn a zone intimately before moving on.
This “Lift-Zone Method” is a powerful way to structure your day. Start by picking a lift on the edge of the resort, away from the central base. Spend the first 90 minutes exploring all the runs within that lift’s pod. You’ll learn the fall lines, find pockets of good snow, and ski with virtually no lift lines. Once you’ve lapped that pod, use a traverse or a connecting run to move to an adjacent pod and repeat the process. This methodical approach prevents you from spending your day traversing long, flat catwalks or getting stuck in queues at major intersections.
Of course, a critical part of reading the map is understanding the universal language of trail difficulty. While the symbols are generally consistent, there are key regional differences, especially between North America and Europe, that every skier should know to avoid unpleasant surprises.
| Region | Beginner | Intermediate | Advanced |
|---|---|---|---|
| North America | Green Circle | Blue Square | Black Diamond |
| Europe (Alps) | Green Circle | Blue / Red Circle | Black Circle |
By combining an understanding of trail ratings with the terrain pod strategy, you transform the map from a confusing graphic into a strategic blueprint for your day. You’re no longer just skiing; you’re executing a plan.
Gondola vs Chairlift vs Drag Lift: Which Gets You Skiing Fastest?
The gut instinct is to favour the enclosed, high-speed gondola. It’s warm, it feels fast, and it’s protected from the elements. However, from a pure efficiency standpoint, the answer is more nuanced and depends heavily on factors beyond the lift’s engineering, such as weather and loading patterns. The critical factor that an operations expert always considers is susceptibility to operational headwinds, most notably wind.
Gondolas and bubble chairs, with their large surface area, act like sails. They are far more susceptible to being put on a “wind hold” than a standard open-air chairlift. A detachable six-pack chairlift might run reliably in 40 mph winds, while a nearby gondola is shut down. Drag lifts (Pomas and T-bars) are even more resilient, often remaining open in conditions that close all other aerial lifts. Therefore, on a windy day, the “fastest” lift is the one that’s actually running. A smart skier checks the weather forecast not just for snow, but for wind speed and direction, and plans their route around more sheltered, resilient lifts.
Case Study: How Palisades Tahoe Decides Which Lifts to Hold in High Wind
At a resort like Palisades Tahoe, known for its high-alpine terrain, wind is a daily operational challenge. While base area winds might be a manageable 20-30 mph, they can easily reach speeds three to six times that at the summit ridges. Operators constantly monitor anemometers across the mountain. If a sensor reports gusts of 120 mph, they won’t even attempt to run the lifts in that zone. This demonstrates that a lift’s mechanical speed is irrelevant if environmental conditions prevent it from operating safely. The truly “fastest” lift is the one least likely to be affected by these predictable weather patterns.
Furthermore, loading and unloading times play a huge role. A well-spaced line at a six-pack chair can load with near-perfect efficiency. In contrast, gondolas often suffer from “clumping,” where large groups struggle to load skis and poles, creating gaps and reducing the lift’s actual PPH. The fastest route to more skiing is often the most consistently moving one, not the one with the highest theoretical top speed.
The Peak Time Mistake That Wastes 90 Minutes in Lift Queues Daily
Every ski resort experiences a predictable, herd-like movement of people that creates the day’s worst bottlenecks. This is the “midday migration.” It occurs between approximately 11:00 AM and 1:00 PM, when a huge percentage of skiers simultaneously decide it’s time for lunch. They ski down from all corners of the mountain and converge on the central base area or the main on-mountain lodges, clogging the key lifts that provide access to and from these hubs.
During these two hours, it’s not uncommon for lift lines at major hubs to swell dramatically. As resort crowd data shows that during peak hours, wait times can easily stretch from 15 to 30 minutes per lift. Do that three times, and you’ve spent 90 minutes standing still. The strategic error is following the herd. The operational expert does the opposite: this is the golden window for skiing.
As the masses head indoors, the lifts on the upper mountain and the periphery of the resort empty out. This is your time to lap the best terrain with minimal waiting. As The Whistler Insider blog notes in its guide to lift line strategy:
I’d say 11 AM to 1 PM is the most popular time to head inside and grab lunch on the mountain.
– The Whistler Insider, Lift Line Strategies: Less Waiting, More Riding — Whistler Blog
The solution is simple: ski through the midday migration. Eat an early lunch at 10:45 AM or a late one at 1:30 PM. Pack a pocket snack to eat on the chairlift. By simply offsetting your lunch break from the peak crowd, you effectively gift yourself two hours of the quietest lift lines and least crowded slopes of the day. It is the single most effective, low-effort strategy to increase your daily vertical.
When Should You Hit Popular Lifts to Avoid 30-Minute Wait Times?
While avoiding the midday migration is a powerful macro-strategy, seizing opportunities at popular lifts requires a more granular, data-driven approach. In the past, this was a guessing game. Today, resort-specific apps provide real-time data that, when used strategically, can unlock pockets of opportunity on even the busiest lifts. The key is to use this technology not just as a map, but as an intelligence tool.
Many major resorts have integrated live and predictive lift line wait times into their official apps. This technology has transformed mountain navigation from a reactive process to a proactive one. Instead of skiing to a lift and discovering a 20-minute queue, you can now anticipate it and adjust your route accordingly. The goal is to identify a “window of opportunity” when a historically busy lift has a temporary lull.
Case Study: EpicMix Time and the End of Guesswork
When Vail Resorts rolled out its EpicMix Time feature, it gave skiers access to real-time, up-to-the-minute wait times for their key lifts. This innovation, which began at its Colorado resorts before expanding, effectively crowd-sourced data to provide transparency. For the strategic skier, this meant they could see from across the mountain that a popular lift like a Back Bowl chair had just cleared out after a temporary closure or a brief rush, allowing them to head there immediately to catch a few queue-free laps before the crowds returned.
Using this data effectively requires a plan. It’s not about constantly staring at your phone, but about checking it at strategic decision points, like at the top of a run before you commit to a certain direction. A quick glance can tell you whether to lap the current pod or make a move towards another zone where lines are shorter.
Your Action Plan: Using Live App Data to Time Your Laps
- Check the Map: Use the interactive map’s GPS tracking alongside real-time and predictive lift line wait times to see which popular lift is about to clear out.
- Monitor Alerts: Cross-check mountain and resort alerts for lift status changes. Predictive wait times often update the moment a wind-held lift reopens, creating a prime window.
- Anticipate Conditions: Correlate wait times with your terrain plan. If a high-alpine lift shows a 5-minute wait and the sun is coming out, that’s your signal to move now.
- Plan for Offline: Switch the app to offline map mode if you expect to lose cell service near a summit. This ensures you don’t lose access to the wait-time map during your window of opportunity.
- Execute Decisively: Once you spot a favorable wait time on a target lift, commit to that route immediately. The window can close quickly as other data-savvy skiers make the same move.
How to Plan Your Open-Top Bus Route to Cover 15+ Landmarks in One Day?
The most efficient tourists in a major city don’t wander aimlessly; they study the bus or subway map to create a logical loop that hits key landmarks without backtracking. A ski resort map should be treated with the same strategic mindset. Think of your ski day not as a random series of runs, but as a “grand tour” of the mountain’s best features. The lifts are your transport, and the iconic runs, bowls, and tree glades are your “landmarks.”
Your goal is to devise a route that flows logically across the resort’s geography. This often means starting at one edge of the resort and working your way across to the other, moving from one terrain pod to the next. For example, you might plan a “High-Alpine Tour” that links all the lifts that access terrain above the treeline. Or you could create a “Groomer Grand Prix” route that connects the resort’s longest and best-groomed blue runs in a continuous, top-to-bottom sequence.
Planning this “bus route” involves looking for key connecting lifts and traverses. A well-placed, short lift ride that transports you from the bottom of one bowl to the top of the next is far more efficient than skiing all the way to the base area and riding two long lifts back up. These connecting pieces are the transfers in your transportation network. Ignoring them is like taking the subway all the way back to the central station just to get to a stop that was one block away on a different line.
This approach also helps in managing energy. By planning a route that flows with the mountain’s layout, you avoid poling across long, flat sections or getting stuck on arduous traverses against the grain. You are working with the system, not fighting it. The result is more quality skiing, less wasted transit time, and a far more satisfying exploration of the entire resort.
How to Choose Cruise Itineraries That Cover Must-See Regional Highlights?
Just as a cruise passenger chooses an itinerary based on a desired experience—Caribbean relaxation, Alaskan wilderness, Mediterranean history—a strategic skier should design their day around a specific goal. Not all ski days are created equal. Trying to do everything at once leads to inefficiency. Instead, choose a “ski itinerary” for the day that focuses on a particular type of terrain or experience. This allows you to select the right lifts and pods to maximise your enjoyment.
Consider these sample itineraries:
- The Powder Hound’s Itinerary: The goal is to find untracked snow. Your map analysis will focus on north-facing, high-alpine bowls served by less-obvious lifts. You’ll start your day on the lifts that open first and provide the quickest access to this terrain, ignoring the groomed runs completely. Your route is a race against other powder seekers to specific, targeted zones.
- The Corduroy Cruiser’s Itinerary: The mission is carving perfect groomers. You’ll focus on the resort’s longest, consistently pitched blue and red runs. Your map analysis will identify pods known for their impeccable grooming and served by high-speed six-packs, allowing you to log maximum vertical on pristine corduroy before it gets chopped up.
- The Family Explorer’s Itinerary: The priority is fun, safety, and variety. You’ll choose an itinerary that links together the resort’s best family-friendly zones, slow-skiing areas, and runs with interesting features like gentle tree trails or kid-friendly adventure parks. Your route avoids steep, intimidating terrain and focuses on lifts that are easy to load and unload.
By defining your mission for the day, your route planning becomes much clearer. You’re no longer just looking for “a run to ski,” but for the *right* run that fits your itinerary. This focused approach ensures you spend your time in the terrain you enjoy most, using the lift network as a tool to execute your plan, much like a cruise ship charting a course for specific ports of call.
Key takeaways
- Think in Uphill Capacity (VTFH): A lift’s value is how many vertical feet it can transport per hour, not its raw speed. Prioritise high-capacity workhorses.
- Conquer by Pod: Mentally divide the resort map into terrain pods served by a primary lift. Master one pod at a time to ski efficiently without excessive traversing.
- Ski Against the Clock: The biggest queues form during the 11 AM to 1 PM “midday migration” to lunch. Ski during this window and eat at off-peak times to enjoy empty slopes.
Does Ski-In/Ski-Out Access Justify Paying 40% More for Accommodation?
The premium paid for ski-in/ski-out lodging is a payment for one thing: convenience. It promises to eliminate the morning hassle and get you onto the snow faster. For many, this perceived advantage justifies a significantly higher cost. However, from an operational perspective, its value diminishes dramatically if you have mastered the strategies of efficient mountain navigation. The core question becomes: are you paying for access, or are you paying to bypass a system you don’t know how to use?
If you can read a map like an operator, understand uphill capacity, and anticipate crowd flow, your starting point becomes less critical. You know how to avoid the main base area chokepoint, even if you start there. You can use a less-crowded beginner lift as a strategic “on-ramp” to the broader lift network, bypassing the main gondola queue. You know that the real skiing doesn’t start at the base, but in the well-chosen terrain pods you’ve planned to hit.
Essentially, mastering the mountain’s transportation grid frees you from geographical dependence. The 15 minutes saved by a ski-in/ski-out location are easily negated if you then proceed to wait 30 minutes in the first lift line. Conversely, a skier staying a 10-minute bus ride away who immediately heads to a high-capacity, low-traffic lift on the edge of the resort will be logging their third run while the ski-in/ski-out guest is still in their first queue. The strategic skier creates their own convenience.
The premium for ski-in/ski-out access, therefore, is not an absolute value. It’s a convenience tax for those who haven’t yet learned to navigate the system efficiently. While it will always offer a pleasant luxury, it is by no means a prerequisite for maximising your time on the slopes. A superior strategy is worth more than a prime location.
By applying these operational strategies, you can reclaim your ski holiday from the queues and transform every day on the mountain into a highly efficient, high-value experience.