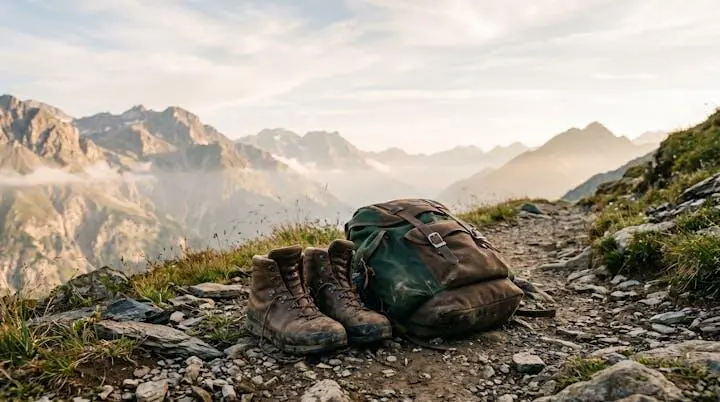
Building a capable adventure kit isn’t about a shopping list; it’s about engineering a system where your budget prioritises the foundational “chassis” (like boots and packs) over the situational “bodywork” (like expensive jackets).
- Your first and largest investments should secure your connection to the ground and your ability to carry weight, as these are the most common points of failure.
- A common mistake isn’t buying cheap gear, but misallocating funds to high-tech items for imagined trips instead of robust basics for actual outings.
Recommendation: Allocate the majority of your initial budget to a pair of professionally-fitted, high-quality trekking boots and a comfortable, well-adjusted backpack before considering any other major purchase.
Staring at a recommended gear list for your first big trek can be daunting. The costs quickly spiral, with individual items like technical jackets reaching well over £1,000 and the total easily exceeding £2,000. For a novice adventurer on a limited budget, this creates a paralysing question: where do you even begin? The common advice is to “buy quality,” but that’s not a strategy; it’s a platitude. It doesn’t tell you *what* quality matters most or how to make smart trade-offs when you can’t afford the best of everything.
Most guides present you with a simple checklist, treating every item as an independent purchase. This approach is fundamentally flawed. It leads to haphazard spending, often influenced by marketing hype around the most visible and expensive items. But what if the secret to building a reliable and affordable gear collection wasn’t in the items you buy, but in the *order* you buy them? The key is to stop thinking like a shopper and start thinking like a system engineer, focusing on system criticality above all else.
This guide offers a different perspective. We will deconstruct the gear list not as a collection of things, but as an integrated system. You will learn to identify the foundational “chassis” of your setup—the non-negotiable items that ensure your safety and success—and distinguish them from the “bodywork” components that provide situational comfort. By re-framing your purchasing decisions around this model, you can strategically allocate your limited funds, avoid costly mistakes, and build a collection that serves you reliably on the adventures you actually take.
This article provides a clear, priority-based framework to guide your spending. By following this structure, you’ll understand exactly where to invest, where to save, and how to build a capable gear collection without breaking the bank.
Summary: A Strategic Guide to Building Your Adventure Gear Kit
- Why Does Spending £400 on Boots Matter More Than a £1,200 Jacket?
- How to Build Your Adventure Gear Collection in Priority Order?
- Buy vs Rent: Which Specialised Gear for Once-a-Year Expeditions?
- The Budget Allocation Mistake That Leaves You Under-Equipped Where It Counts
- How to Test Expensive Gear Before Committing to Purchase?
- How to Select Trekking Boots for Rocky and Uneven Ground?
- What Equipment Do You Need for Your First Ice Climbing Attempts?
- How to Select Trekking Boots for Rocky and Uneven Ground?
Why Does Spending £400 on Boots Matter More Than a £1,200 Jacket?
To understand gear priority, we must use the chassis-vs-bodywork analogy. A car’s chassis provides the structural foundation; it’s responsible for support, stability, and handling the load. The bodywork protects you from the elements. In adventure gear, your boots and backpack are the chassis. Your jackets and layers are the bodywork. A budget-conscious adventurer’s most common and critical mistake is over-investing in impressive bodywork while skimping on the chassis. A £1,200 waterproof jacket is a remarkable piece of technology, but it cannot prevent a turned ankle or a back injury from an ill-fitting pack.
Your boots are the single most critical interface between you and the terrain. They bear your entire weight, plus the weight of your pack, over thousands of repetitive steps on uneven ground. A failure here—whether a catastrophic gear blowout or a “simple” blister—is not a minor inconvenience; it’s a mission-ending event. The data is clear: a systematic review of 17,757 hiking injuries found the lower limb was consistently the most common injury location. Investing in quality footwear is a direct investment in injury prevention and your ability to complete the journey.
In contrast, the primary function of a high-end jacket is to manage severe weather, an important but often situational need. On many trips, a more modest jacket performs perfectly well. You can often mitigate poor jacket performance by seeking shelter or adjusting your plans. You cannot mitigate boot failure mid-hike. Therefore, allocating £400 to a pair of expertly fitted, supportive boots is a far more strategic use of a limited budget than spending three times that on a top-of-the-line jacket. First, you build a solid foundation; only then do you add the protective shell.
How to Build Your Adventure Gear Collection in Priority Order?
With the chassis-first principle established, the priority order becomes logical. Instead of a random shopping list, you build from the ground up, focusing on system-critical components. This can be visualized as a pyramid of needs. At the base are the items essential for almost any overnight adventure. As you move up the pyramid, the gear becomes more specialized and less frequently required. Your budget allocation should mirror this structure, with the bulk of your investment securing the base of the pyramid before you spend on the apex.
The priority tiers are as follows:
- Tier 1: The Foundational Chassis. This is your absolute priority. It consists of your primary points of contact with the world and your load: footwear (boots/shoes), backpack, and sleep system (sleeping bag and mat). A failure in any of these three areas almost guarantees the end of your trip. These are the items you should buy first and where the highest proportion of your budget should go.
- Tier 2: The Core Layering System. This includes your base layer, mid-layer (fleece or synthetic insulation), and a reliable waterproof-breathable shell (rain jacket and trousers). This system works together to manage moisture and temperature. While a top-tier jacket is not a day-one priority, a functional, reliable shell is still a core component.
- Tier 3: Essential Safety and Navigation. This tier covers a head torch, a map and compass (and the knowledge to use them), a first-aid kit, and a water filter or purification system. These items are often less expensive but are non-negotiable for safety.
- Tier 4: Specialised and Activity-Specific Gear. This is the apex of the pyramid. It includes items like ice axes, crampons, climbing harnesses, or four-season tents. These are high-cost, low-frequency items that are prime candidates for renting.
This tiered approach provides a clear roadmap. Fully equip yourself with high-quality, reliable gear from Tier 1 before you even consider a major purchase in Tier 4. As the Trail Gear Prices Editorial Team notes in their “Rent vs Buy Outdoor Gear” guide, this logic leads to a practical ownership model. They state:
Smart outdoor enthusiasts use a hybrid approach: buying core gear they’ll use frequently while renting specialty items.
– Trail Gear Prices Editorial Team, Rent vs Buy Outdoor Gear: Complete Cost Analysis and Decision Guide
Buy vs Rent: Which Specialised Gear for Once-a-Year Expeditions?
Once you have secured your foundational “chassis” gear, the buy-vs-rent question becomes central to building out the rest of your collection, especially for Tier 4 items. For specialized equipment needed for a once-a-year expedition—like snowshoes, avalanche safety gear, or a full-on mountaineering tent—renting is almost always the smarter initial choice. It allows you to access high-performance equipment without the significant upfront cost, storage burden, and maintenance commitment.
A simple way to decide is to calculate a break-even point. Divide the purchase price of an item by the daily or weekly rental cost. This tells you how many times you’d need to use the gear to justify buying it. For example, if a £400 four-season tent rents for £30 per day, your break-even point is around 13 days of use. If you only plan one 5-day trip per year, renting is the clear financial winner for the first two years. This financial reality is clearly shown in a cost comparison for shelters.
| Option | Typical Cost | Best suited for |
|---|---|---|
| Buy a tent | Roughly $230–$460 one-time | Frequent, multi-trip use |
| Rent a tent (per day) | Roughly $25–$34 per day | Occasional or once-a-year trips |
However, the decision isn’t purely financial. For life-saving safety equipment, another factor emerges: performance familiarity. You need to be intimately familiar with how your safety gear works under pressure. As the editorial team at evo explains regarding avalanche transceivers:
Successful multiple burial searches are an advanced skill to master, requiring intimate familiarity with your beacon.
– evo Editorial Team, How to Choose an Avalanche Beacon / Avalanche Transceiver, evo
This principle applies to any critical safety device. While you might rent an avalanche kit for your first guided course, if you plan to venture into the backcountry regularly, owning your own beacon, shovel, and probe is essential. The muscle memory and confidence gained from practicing with your own equipment are priceless. For most other specialized gear, default to renting for your first few outings. This not only saves money but also acts as a real-world test, helping you decide what features you truly value if you eventually decide to buy.
The Budget Allocation Mistake That Leaves You Under-Equipped Where It Counts
The most damaging budget mistake for a new adventurer is not buying cheap gear; it’s a fundamental budget allocation mismatch. This happens when you are seduced by the “bodywork”—the high-tech, highly-marketed, and often visually impressive gear—and spend a disproportionate amount of your budget there. You walk out of the store with a state-of-the-art £1,200 jacket but only £150 left for boots. The result is a kit that looks professional but is functionally compromised at its core. You’ll be dry in a downpour, but you’ll also have blisters, a sore back, and an increased risk of a stumble turning into a sprain.
This mistake is often driven by optimism bias. We buy gear for the epic, once-in-a-lifetime expedition we *imagine* taking, rather than for the dozen weekend trips we will *actually* take. A more strategic approach involves a dose of realism. Before making any large purchase, track your real-world outings for a season. Are you mostly doing day hikes in local hills or are you genuinely planning multi-day treks in remote mountains? Buy for your reality, not your fantasy.
Another aspect of this mistake is ignoring the “hidden” costs associated with headline gear. Buying a packraft isn’t just the cost of the raft; you also need a paddle, a personal flotation device (PFD), and a dry bag. These accessories add up. As the team at Last Minute Gear points out, there’s a direct trade-off with budget choices, stating that “cheaper gear is generally bulky & less warm.” While true, it’s better to have a slightly bulkier but adequate sleeping bag and a solid pair of boots than a top-tier, ultra-light bag and cheap footwear that will cripple you on the trail. The key is to accept small compromises on the “bodywork” to ensure the “chassis” is completely bombproof.
To avoid this trap, follow a simple rule: never let a “bodywork” purchase compromise the quality of a “chassis” purchase. Create your budget around your Tier 1 items first, allocating a generous amount to get the best boots and pack you can afford. Only then should you see what’s left for the rest of the layering system and other accessories.
How to Test Expensive Gear Before Committing to Purchase?
Investing a significant portion of your budget—potentially £200-£400—into a single “chassis” item like trekking boots can feel daunting. The risk of making the wrong choice is high. The solution is rigorous testing *before* you commit. This goes far beyond simply trying them on in the shop for a few minutes. You need to simulate real-world conditions as much as possible to identify potential pressure points and fit issues before they can ruin a trip. A good outdoor store will not only allow but encourage this.
Renting can also be an excellent form of testing. Renting a specific model of a backpack for a weekend hike gives you invaluable insight into how it performs when fully loaded and carried for hours. You’ll discover if the straps chafe, if the back panel ventilates well, and if the pockets are genuinely useful. This is real-world data you can’t get from an in-store trial. For boots, the process is even more critical and hands-on, as fit is deeply personal.
A thorough boot-fitting process is your best defence against a poor investment. Don’t rush it. Plan to spend at least an hour at the store and follow a clear, methodical process to ensure you’re making an informed decision. The right fit will prevent a host of problems on the trail, making this time investment one of the most valuable you can make. The following checklist outlines the essential steps for auditing the fit of a new pair of boots.
Your 5-Point Audit for a Perfect Boot Fit
- Foot Measurement: Insist on having your feet professionally measured for length, width, and arch. Don’t just rely on your standard shoe size, and try on boots late in the day when your feet have naturally swelled.
- Insole Check: Remove the boot’s insole and stand on it with your heel aligned to the back. You should have a thumb’s width (about 1/2 to 3/4 inch) of space between your longest toe and the end of the insole.
- Initial Fit & Lacing: Put the boot on with the type of socks you’ll hike in. Before lacing up, slide your foot forward until your toes touch the front. You should be able to comfortably slide one finger between your heel and the back of the boot.
- Movement Test: Lace the boots up snugly, but not too tight. Walk around the store, preferably on any available ramps or stairs, to simulate inclines and declines. Pay close attention to any heel lift, pinching, or pressure points.
- Wear at Home: Once you’ve purchased the boots, wear them around your house for several hours before taking them outside. This is your final chance to detect issues while you can still return them. As the experts at REI wisely advise, you must ” Break your boots in before your first trip.“
How to Select Trekking Boots for Rocky and Uneven Ground?
When selecting trekking boots specifically for challenging terrain, the focus shifts from general comfort to specific features that provide stability and protection. The consequences of a poor choice on rocky, uneven ground are magnified. It’s not just about comfort anymore; it’s about preventing acute injuries. A boot that feels fine on a flat path can reveal its flaws dramatically on a steep, scree-covered slope, leading to the most common of trail ailments.
The number one enemy is the blister. Blisters are caused by friction, which is exacerbated by poor fit, excessive foot movement inside the boot, and moisture. On uneven ground, your foot is constantly shifting, increasing the potential for rubbing. Comprehensive research on trail injury patterns shows that blisters represented 8–33% of all reported injuries in some hiking studies—a staggering number for a preventable issue. A properly fitted boot that locks your heel in place is your primary defence.
Beyond blisters, the wrong boot increases the risk of more serious injuries. Ankle sprains and twists are common when a boot lacks sufficient ankle support and torsional rigidity. A soft, flexible boot might be comfortable for a walk in the park, but on rocky terrain, it allows your foot and ankle to twist unnaturally when you step on an unstable rock. This is why a dedicated trekking boot is fundamentally different from a trail shoe. It’s built with a stiffer structure precisely to resist these forces and protect your joints.
Ultimately, selecting a boot for this environment is an exercise in risk management. You are choosing a tool designed to mitigate the specific hazards of the terrain. The initial investment in a boot with the right stiffness, support, and fit pays dividends in every step, translating directly into a safer and more enjoyable experience by keeping you on the trail and out of the first-aid kit.
What Equipment Do You Need for Your First Ice Climbing Attempts?
Ice climbing serves as a perfect case study for the “rent first” principle applied to Tier 4, highly specialized activities. The barrier to entry in terms of equipment cost is substantial, and the gear is so specific that it has little to no use outside of its intended environment. For a novice, purchasing a full ice climbing kit would be a significant financial misstep.
The essential equipment for a beginner’s first time on the ice is extensive. This isn’t just one or two items; it’s a complete technical system where each component is critical for safety and performance. A typical beginner setup includes:
- Mountaineering Boots: These are not the same as trekking boots. They are rigid-soled boots designed to accept crampons.
- Crampons: The metal spikes that attach to your boots for traction on ice.
- Ice Axes/Tools: A pair of specialized tools used to strike the ice and pull yourself upwards.
- Helmet: Absolutely essential for protection from falling ice and debris.
- Harness: A climbing harness to connect you to the safety rope.
- Belay Device and Carabiners: For managing the rope system.
The combined cost of purchasing even entry-level versions of these items can easily exceed £1,500. This is a massive investment in an activity you may not enjoy or pursue long-term. Consequently, the standard and highly recommended pathway for anyone curious about ice climbing is to book a day with a professional guide service. These services provide all the necessary technical equipment as part of the package. This allows you to experience the sport, learn basic techniques in a safe environment, and use high-quality gear without any of the ownership costs. It perfectly embodies the strategy of renting to explore a new facet of adventure.
Key Takeaways
- Prioritise Your Budget on the “Chassis”: Invest in high-quality boots and a backpack before any other major gear.
- Buy for Reality, Not Fantasy: Purchase gear for the trips you consistently take, not the epic ones you imagine.
- Rent Before You Buy for Specialised Gear: Use rentals to test expensive, activity-specific equipment and confirm your commitment before purchasing.
How to Select Trekking Boots for Rocky and Uneven Ground?
Now that you understand the risks of poor boot choice, let’s focus on the specific technical features that make a boot suitable for challenging terrain. This is where you look “under the hood” at the boot’s construction—its internal chassis—to ensure it can provide the necessary support and protection. Three key features to examine are the boot’s stiffness, the outsole, and its weight.
First is stiffness, which comes from components inside the midsole called shanks and plates. As REI’s experts explain, “These 3-5mm thick inserts are sandwiched between a boot’s midsole and outsole to add load-bearing stiffness.” Shanks are inserts that add rigidity, preventing the boot from flexing too much when you’re carrying a heavy pack or stepping on sharp rocks. A stiffer boot protects your foot from feeling every sharp edge underfoot and reduces the strain on your arches over long distances. For rocky ground, a boot with at least a half-length shank is highly recommended.
Second, inspect the outsole. Look for deep, aggressive lugs (the bumps on the sole) that are widely spaced. This pattern provides excellent traction on soft surfaces like mud and helps shed debris. A good rock-oriented boot will also feature a “heel brake,” which is a clearly defined heel edge that helps prevent sliding on steep descents. The rubber compound itself is also crucial; stickier rubbers offer better grip on bare rock but may wear faster, representing a common performance trade-off.
Finally, consider the weight. While stiffness and support are vital, there’s a penalty for over-engineering. Heavier boots require more energy to lift with every step, leading to faster fatigue. As a research-backed analysis of footwear biomechanics shows that heavier hiking boots measurably increase the energy expenditure of walking. The ideal boot, therefore, is not necessarily the heaviest, most tank-like option, but the one that provides sufficient support and protection for your specific needs and pack weight, without being excessively heavy. This is the balance you seek: a robust chassis without unnecessary dead weight.
By adopting this priority-focused, system-based approach, you can methodically build a reliable and capable adventure gear collection that aligns with your budget and your real-world needs. Start by investing in a high-quality “chassis,” test your gear rigorously, and make smart rent-or-buy decisions for specialized items. This strategy will serve you far better than any simple shopping list, ensuring you are well-equipped where it truly counts.