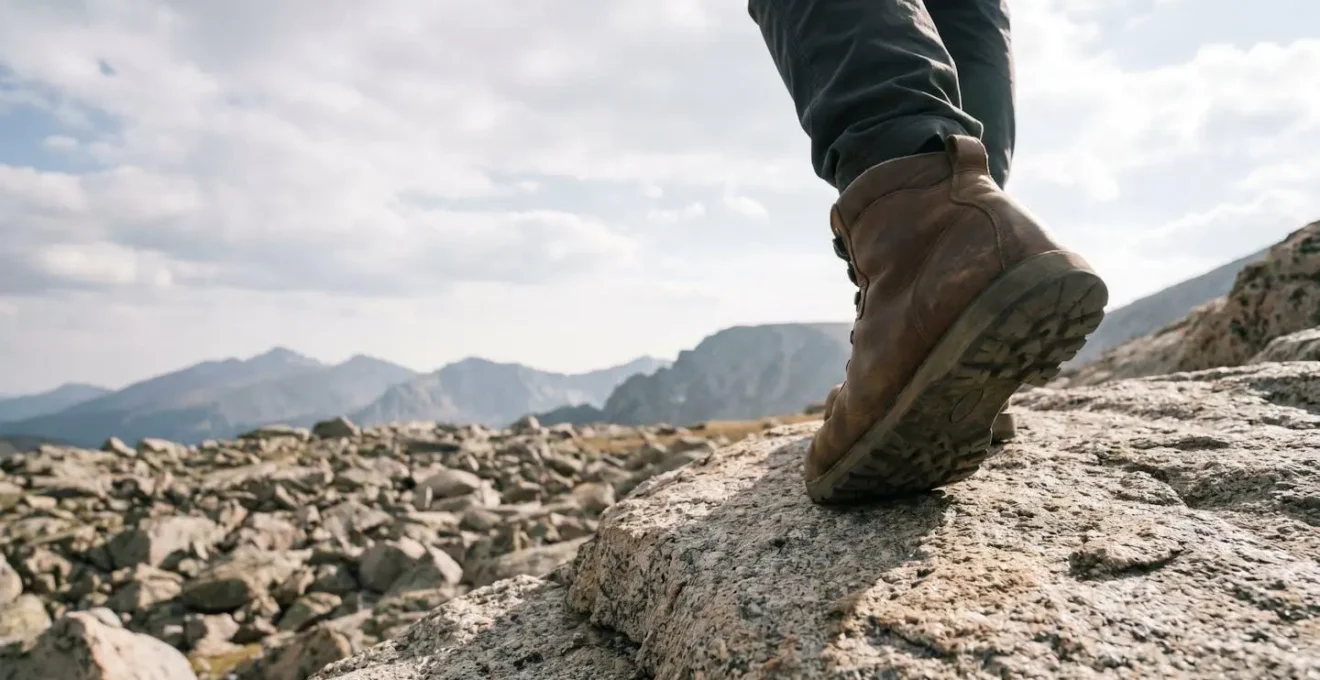
Investing in the right trekking boot is a critical safety decision, not a gear preference, because the structural integrity of your footwear is what stands between you and a catastrophic failure on technical terrain.
- Inexpensive foam midsoles invisibly collapse under load, leading to a sudden loss of support and protection far from the trailhead.
- True stability comes from a boot’s engineered ‘chassis’—its torsional rigidity and midsole material—not just the height of its ankle cuff.
Recommendation: Prioritize boots with a dense Polyurethane (PU) or TPU midsole and a stiff chassis for rocky ground, as this investment in structural durability is the most important one you will make for your safety.
The moment every hiker transitioning to challenging terrain dreads is not the steep ascent or the burning in their lungs. It’s that subtle, unnerving ankle roll on a bed of loose scree, or the jarring impact that shoots up your leg from a misplaced step on sharp, uneven rock. The common advice is to simply get boots with “good grip” and “ankle support.” But this advice fails to address the fundamental question: what truly makes a boot reliable when the ground beneath you becomes unpredictable and unforgiving? Many hikers, unsure of what investment is necessary, opt for a mid-range or budget-friendly option, believing a boot is just a boot.
This approach often overlooks the hidden engineering that separates a dependable trekking boot from one destined for catastrophic failure. The real difference isn’t in the colour or the brand logo; it’s in the material science of the midsole, the construction of the boot’s chassis, and its ability to maintain structural integrity after thousands of repetitive, high-impact steps. Understanding this is the key to moving beyond generic features and making an informed investment in your safety and performance. This guide isn’t a simple feature checklist. It’s a deep dive into the structural principles of trekking footwear.
We will deconstruct why cheap boots fail, analyse the critical components that provide stability on rugged ground, and provide a strategic framework for building your gear collection. By focusing on the boot as an engineered footwear system, you’ll learn to prioritize your investment where it matters most: the direct interface between you and the mountain.
Summary: A Technical Guide to Selecting Trekking Boots for Rugged Terrain
- Why Do Cheap Boots Fail Catastrophically on Rugged Mountain Terrain?
- How to Select Trekking Boots for Rocky and Uneven Ground?
- Ankle Support vs Lightweight Flexibility: Which Boot Style for Rugged Trails?
- The Boot Break-In Mistake That Causes Blisters on Day 1 of Tough Treks
- When to Replace Trekking Boots Before They Fail on Challenging Terrain?
- Why Does Spending £400 on Boots Matter More Than a £1,200 Jacket?
- What Equipment Do You Need for Your First Ice Climbing Attempts?
- How to Build Your Adventure Gear Collection in Priority Order?
Why Do Cheap Boots Fail Catastrophically on Rugged Mountain Terrain?
The failure of inexpensive boots on rough terrain is rarely a dramatic, visible event like a sole peeling off. Instead, it’s a silent, gradual process of internal breakdown called midsole collapse. The midsole is the crucial layer of foam between the boot’s outer tread and your foot, responsible for cushioning, support, and shock absorption. In most budget-friendly boots, this layer is made of Ethylene Vinyl Acetate (EVA), a light and soft foam that feels comfortable in the store but has a critical weakness: it loses its ability to rebound under repeated stress.
As the experts at Meindl USA note, EVA foam “holds a memory.” After thousands of steps carrying your body weight and a pack, the microscopic cells within the foam crush and do not recover. This process, known as compression set, happens far faster than you might think. In fact, research on boot anatomy shows that EVA foam compresses about 12 percent by 300 miles and is often completely compromised between 500 and 700 miles. Long before the outsole tread is worn or the upper shows scuffs, the boot’s internal support structure has effectively vanished, leaving your foot vulnerable to stone bruises and impact injuries.
Microstructural Fatigue Analysis of EVA Midsole Foams
To understand this invisible failure, researchers examined used EVA midsoles under a scanning electron microscope. They discovered definitive proof of structural breakdown: buckled and broken cell walls were found in the high-pressure zones under the heel and forefoot. This microstructural evidence confirms that the boot’s supportive chassis collapses from the inside out, long before any external signs of wear become apparent. This is the catastrophic failure that leaves a hiker with “flat,” unsupportive boots in the middle of a multi-day trek.
This internal collapse is why a boot that felt great on easy day hikes suddenly feels like a flimsy shoe on a rocky mountain path. The midsole is no longer providing the foundational support, or “chassis,” needed to protect your foot from the sharp, uneven ground. The failure isn’t in your hiking ability; it’s in the material science of the boot itself.
How to Select Trekking Boots for Rocky and Uneven Ground?
Selecting a boot for rocky terrain requires shifting your focus from superficial features to the boot’s underlying structural components. You are not buying a shoe; you are investing in a footwear system designed for stability and protection. This system consists of the boot, your sock, and a supportive insole working in harmony. A quality boot provides the essential foundation: a torsionally rigid chassis that resists twisting on uneven surfaces and a durable midsole that won’t collapse under load.
As the illustration shows, these three components—boot, sock, and insole—must be considered together. However, the boot’s midsole material is the single most critical choice for rugged trails. While soft EVA is suitable for light trails, rocky ground demands a more robust material that can withstand high-impact, repetitive compression without breaking down. The two primary alternatives are Polyurethane (PU) and Thermoplastic Polyurethane (TPU).
PU is a denser, firmer, and significantly more durable foam than EVA. It offers less initial “plush” cushioning but provides a stable, long-lasting platform that excels at absorbing shock on hard surfaces. TPU is often used as a structural element—like a supportive frame or shank embedded within the midsole—to provide enhanced torsional rigidity and energy return. Boots designed for serious trekking often use a combination, such as a dual-density midsole with a firm PU frame and a slightly softer pod of EVA for targeted cushioning. This material choice is a non-negotiable for anyone venturing onto technical ground.
The following table breaks down the key performance differences, making it clear why PU and TPU are superior for the demands of rocky terrain. An analysis of midsole technologies confirms their suitability for challenging conditions.
| Midsole Material | Cushioning | Durability on Rough Ground | Best Use Case |
|---|---|---|---|
| EVA | Light and cushioned | Can lose cushioning in wet conditions | Day hiking, groomed trails |
| PU | Firmer, less plush | Resists wear and crushing on hard ground | Rough, rocky terrain, heavier loads |
| TPU | Balanced performance | Fights compression and weather better than EVA or PU alone | Serious, technical, multi-day treks |
Ankle Support vs Lightweight Flexibility: Which Boot Style for Rugged Trails?
One of the most debated topics among hikers is the choice between a supportive high-cut boot and a flexible low-cut shoe. For those upgrading to technical terrain, the data is unambiguous. According to hiking injury data, the ankle is the most commonly injured body part while hiking, accounting for 42% of all hiking injuries. This risk is magnified on uneven, rocky ground where a misstep can easily lead to a sprain or twist.
The common misconception is that “ankle support” comes solely from the height of the boot’s cuff. While a higher cuff can help prevent debris from entering the boot and provide some proprioceptive feedback, true stability comes from the boot’s torsional rigidity. This is the resistance of the boot’s chassis—the integrated unit of the insole, midsole, shank, and outsole—to twisting forces. A boot with high torsional rigidity acts like a stable platform, keeping your foot level even when the ground beneath it is angled. You can test this by holding a boot at the heel and toe and trying to twist it. A boot suitable for rocky terrain will resist this motion significantly.
A systematic review covering over 17,000 injured hikers consistently found that blisters and ankle sprains were the most frequent injuries, with the lower limb being the most affected area. This overwhelming evidence reinforces that the boot’s foundational stability is paramount. For rocky and uneven ground, a mid or high-cut boot with a stiff, torsionally rigid chassis is the superior choice. The slight weight penalty is a negligible price to pay for the dramatic increase in stability and injury prevention. A lightweight, flexible trail runner, while excellent for groomed paths, simply lacks the structural integrity to protect the ankle from the rotational forces common on technical trails.
While a flexible boot might feel more agile, that agility comes at the cost of the structural support that prevents the most common hiking injuries. For a hiker carrying a pack over unpredictable terrain, the firm, supportive platform of a proper trekking boot is a critical piece of safety equipment, not a style choice.
The Boot Break-In Mistake That Causes Blisters on Day 1 of Tough Treks
The classic advice to “break in your boots” is often misunderstood. Many hikers believe it’s about softening stiff leather. While that’s part of it, the primary goal of breaking in a modern boot is to allow the boot’s internal padding and your foot to conform to one another, and crucially, to identify and address “hot spots” *before* they become debilitating blisters. The biggest mistake is assuming a few short walks are sufficient. For a sturdy trekking boot, the break-in process is a systematic, multi-week endeavor.
A hot spot is a precursor to a blister, an area of friction or pressure that feels warm or irritated. Ignoring it is the fastest way to ruin a trek. The break-in period is your chance to find these spots while the stakes are low. Start by wearing the boots around the house for several hours, then progress to short walks on pavement, then to local trails with moderate hills, all while wearing the exact sock system you plan to use on your trek. This gradual increase in duration and intensity is vital. The evidence is clear: a review of blister prevention studies found that cadets who wore their boots more than 20 hours in the two weeks before training had a significantly lower blister rate than those who did not.
During this process, pay obsessive attention to your feet. The moment you feel any rubbing or pressure, stop and address it. This could involve adjusting the lacing to relieve pressure, applying moleskin or preventative tape to the area, or trying a different sock. This proactive management is what truly constitutes “breaking in” a boot. It’s not a passive process of wearing them; it’s an active process of tuning the fit of your entire footwear system.
Your Action Plan: Trailside Blister Prevention and Care
- Wear properly fitted boots that prevent heel slip but allow toe movement; this is your foundation.
- Change into dry, moisture-wicking socks (never cotton) during the day, as moisture accelerates blister formation.
- Address hot spots immediately with tape; protect small, intact blisters (under 5mm) with a donut-shaped pad.
- Drain larger blisters with a sterilized needle but leave the skin roof intact to act as a natural bandage.
- Watch for signs of infection like pus, increasing redness, warmth, or red streaks, which signal the need for immediate medical attention.
When to Replace Trekking Boots Before They Fail on Challenging Terrain?
Unlike running shoes with a clear mileage-based lifespan, the retirement point for a quality trekking boot is determined by the degradation of its structural components, not just visible wear. As we’ve established, the most common point of failure is the internal collapse of the midsole. The key is to recognize the signs of this breakdown before the boot fails you on the trail. The first clue is often felt, not seen: the boot feels “flat,” offering less cushioning and support. Your feet and joints may feel more fatigued after a hike than they used to.
Visually, there are several key indicators. Examine the sides of the midsole for deep, horizontal compression wrinkles; this is a clear sign that the foam’s cellular structure is collapsing. Another critical test is to place the boots on a flat surface and view them from behind. If they tilt noticeably inward or outward, the midsole is no longer providing neutral support. Finally, look at the outsole. While worn-down lugs are an obvious sign, pay closer attention to the rubber’s texture. As shown in the macro image, when the rubber becomes hardened, glazed, or develops fine cracks, it has lost its pliability and grip, making it unreliable on wet or smooth rock.
However, one of the primary benefits of investing in a premium, PU-midsole boot is its potential for a second life through resoling. A well-built boot with a Goodyear welt or similar stitched construction can often be rebuilt by a skilled cobbler. This is an incredible long-term value proposition. In fact, gear lifecycle research shows that resoling leather boots can stretch their useful life to several thousand miles—potentially ten times the lifespan of a disposable trail runner. You should consider replacement over resoling when the leather upper is cracked beyond repair, the internal waterproofing liner has failed, or the midsole has collapsed to a point where even a new outsole wouldn’t restore the boot’s supportive chassis.
By regularly inspecting for these signs of structural fatigue, you can confidently decide when to repair or replace your boots, ensuring you always have a trustworthy platform for your adventures.
Why Does Spending £400 on Boots Matter More Than a £1,200 Jacket?
In the world of outdoor gear, it’s easy to be captivated by high-tech, high-price-tag items like a £1,200 waterproof-breathable jacket. Yet, for the hiker venturing onto rocky, technical terrain, a £400 investment in premium boots is profoundly more critical to their safety and success. The reason is simple: your boots are not passive apparel; they are active, load-bearing safety equipment. No other piece of gear has such a direct and consequential impact on preventing the most common and debilitating trail injuries.
As the experts at REI Co-op state succinctly:
A good pair of boots is perhaps the most important piece of equipment a hiker can own.
– REI Co-op Expert Advice, How to Choose Hiking Boots
This isn’t hyperbole. A high-end jacket keeps you dry and comfortable, which is important for preventing hypothermia. However, a boot’s failure—a collapsed midsole leading to a twisted ankle or a loss of traction causing a fall—can be catastrophic. The consequences are immediate and have a much higher potential to result in serious injury and the need for rescue. Analysis confirms that boots with adequate ankle support and torsional stability directly reduce the risk of sprains, especially on the loose, challenging ground where your ankle is constantly tested.
The £400 price tag of a premium boot from a reputable European manufacturer isn’t for a brand name. It’s for superior materials (like dense PU midsoles), more complex and durable construction (like stitch-down welts that allow resoling), and a rigorously engineered chassis that provides reliable support for hundreds of miles under heavy load. A £1,200 jacket might use a slightly more breathable membrane, but the performance difference between it and a £600 jacket is marginal for most users. The performance and safety difference between a £150 boot with an EVA midsole and a £400 boot with a PU chassis is monumental. Your boots are the foundation of your entire hiking system; prioritizing your budget here is the smartest investment you can make.
What Equipment Do You Need for Your First Ice Climbing Attempts?
As your hiking ambitions grow, you might be drawn to winter objectives that require crossing glaciers or attempting your first pitches of ice climbing. This transition demands a significant step up in the technical capabilities of your footwear. Your standard trekking boots, even robust ones, are likely unsuitable. The critical factor is compatibility with crampons, the metal frames with spikes that attach to your boots for traction on ice and hard snow. This compatibility is defined by a standardized “B” rating for boots and “C” rating for crampons.
Boots are rated from B0 (flexible trekking boots, not crampon compatible) to B3 (fully rigid boots for technical ice climbing). Crampons are rated from C1 (flexible, strap-on) to C3 (fully rigid, step-in). The key is matching the boot’s rigidity to the crampon’s design. A flexible B1 boot, for example, can only be safely used with a flexible C1 strap-on crampon. Attempting to pair it with a more rigid C2 crampon would cause the crampon to pop off under flex, creating a highly dangerous situation.
For a first foray into ice climbing or general mountaineering, a B2 boot is often the ideal starting point. These boots have a stiffened sole and a heel welt (a plastic ledge) that allows them to be paired with semi-automatic C2 crampons, which offer a much more secure and precise fit than C1 strap-on models. As noted by the gear experts at Much Better Adventures, “Ideally, if your boots are rated B2, crampons rated C2 are best.” This combination provides enough flexibility for long walking approaches but sufficient rigidity for front-pointing on moderate ice. The following chart clarifies this essential compatibility system.
Understanding this rating system is non-negotiable for safety. This overview from an in-depth guide to mountain footwear breaks down the compatibility you must adhere to.
| Boot Rating | Compatible Crampons | Typical Use |
|---|---|---|
| B0 | Not crampon compatible | Standard trekking boots for trail and rock, unsuitable for ice climbing |
| B1 | C1 only | Should only be used with strap-on crampons |
| B2 | C1 or C2 | Can be paired with strap-on or semi-automatic crampons |
| B3 | C1, C2 or C3 | Can be used with the full range of crampons for technical ice and mixed climbing |
Key Takeaways
- Midsole Collapse is the Real Enemy: The catastrophic failure of cheap boots is the invisible, internal crushing of the EVA foam midsole, not external wear.
- The Boot is a System: True performance comes from the synergy of a well-constructed boot, moisture-wicking socks, and a supportive insole.
- Prioritize the Chassis: For safety on technical terrain, a boot’s torsional rigidity and durable PU/TPU midsole are a more critical investment than any other piece of gear.
How to Build Your Adventure Gear Collection in Priority Order?
Building a comprehensive gear collection for expanding mountain adventures can feel overwhelming and expensive. The key is a progressive, needs-based approach, especially when it comes to footwear. The most common mistake is buying a boot that is too specialized too soon. An ultra-aggressive, fully rigid B3 mountaineering boot will be overkill and painfully uncomfortable on the long trail approaches that constitute 90% of most alpine adventures. Your gear should match your objectives, not outpace them by a decade.
The smartest strategy begins with a versatile, high-quality “quiver-of-one” trekking boot. This should be a boot with a durable PU midsole and enough torsional stiffness to handle heavy packs and rocky terrain with confidence. This is your workhorse for everything from demanding multi-day treks to non-technical peak-bagging. This single, well-chosen pair will serve you for years and cover the vast majority of three-season adventures.
Only when your ambitions genuinely progress to winter mountaineering or glacier travel should you consider adding a second, more specialized boot. A B2-rated boot is the logical next step for most, as it unlocks compatibility with C2 crampons for moderate snow and ice routes. This modular approach—adding specialized pieces on top of a solid foundation—is far more economical and practical than buying a top-of-the-line boot you’ll rarely use. It ensures you always have the right tool for the job without compromising comfort or overspending.
Your Action Plan: Progressive Boot-Buying Strategy
- Avoid the temptation to buy the most aggressive, technical boot first; it will likely be overkill and uncomfortable for most of your hiking.
- Start with a versatile, mid-range trekking boot (like a B1/B2 hybrid) that can cover everything from trail hiking to moderate glacier travel for your first several years.
- Choose a first mountaineering boot that accepts both C1 (strap-on) and C2 (semi-automatic) crampons to maximize compatibility with rental gear as you learn.
- Only add a stiffer, more specialized boot to your collection once your objectives genuinely and consistently require its specific performance features.
Now that you understand the principles of boot construction and gear progression, the next logical step is to honestly assess your current and future hiking objectives. Use this knowledge to evaluate whether your current footwear provides the necessary structural support, and plan your next investment wisely to ensure years of safe and comfortable adventures.