In summary:
- Reaching Everest Base Camp is highly achievable for determined individuals, relying more on structured preparation and pacing than elite athleticism.
- The key to success is a “Trekking Pathway”—a progressive series of three preparatory hikes that build specific, trail-proven resilience and altitude experience.
- Mastering acclimatisation discipline, particularly the “climb high, sleep low” principle, is far more critical for safety and success than raw cardiovascular fitness.
- Your goal isn’t to become a marathon runner; it’s to become comfortable hiking for 6-7 hours on consecutive days with a weighted pack.
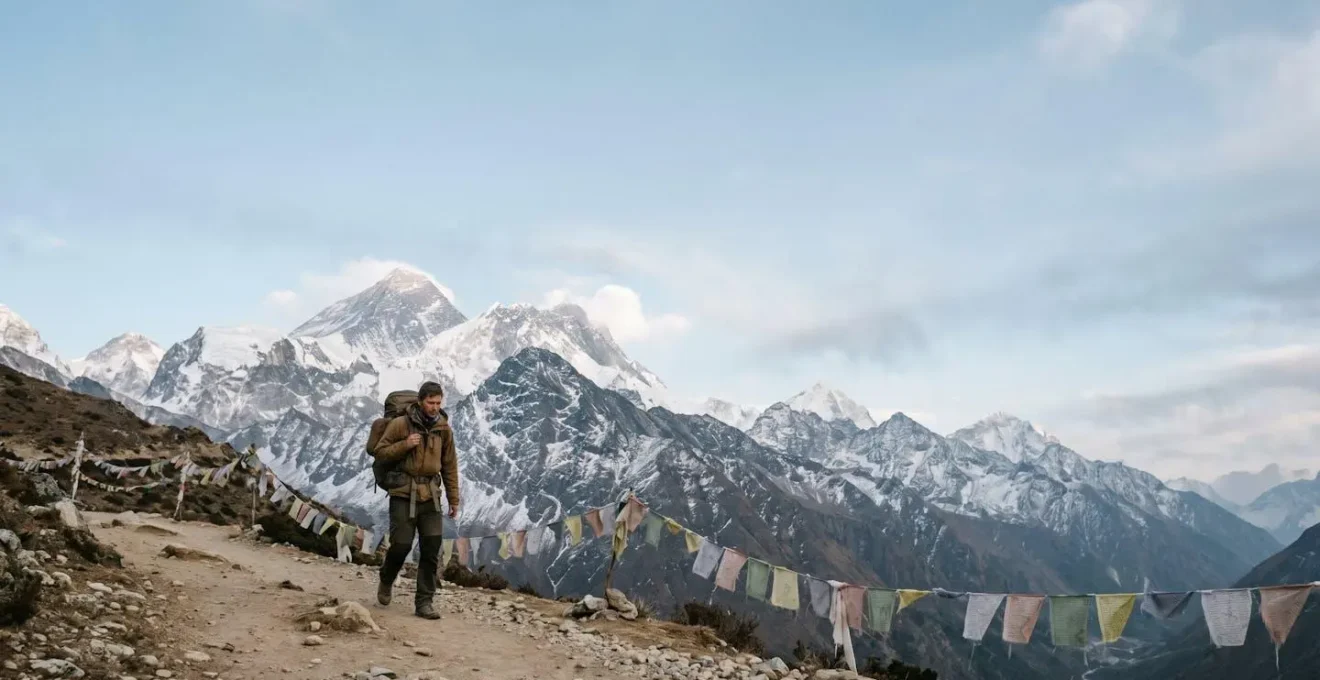
The image of Mount Everest’s snow-dusted peak against a crisp blue sky is etched into the global consciousness. For many, the trek to its Base Camp (EBC) represents the pinnacle of accessible adventure—a journey that brushes against the roof of the world. Yet, this dream is often quickly followed by a wave of self-doubt and a flood of intimidating questions. Am I fit enough? How do you even begin to train for something so massive? The internet offers a blizzard of generic advice: “do more cardio,” “break in your boots,” “prepare for the cold.” While correct, this advice misses the fundamental truth I’ve witnessed over 50+ expeditions.
The most common mistake aspiring trekkers make is viewing EBC as a single, monolithic fitness test. They train for an imagined, brutal final exam, often burning out or focusing on the wrong things. They try to become marathoners, when they should be focused on becoming resilient, multi-day hikers. What if the secret wasn’t a grueling, all-or-nothing training regime, but a smarter, progressive journey? What if you could build the exact physical and mental strength required not in the gym, but on the trail itself?
This is the core of the milestone-focused approach. We’re going to dismantle the Everest Base Camp challenge into a series of manageable, confidence-boosting steps. This guide lays out a proven “Trekking Pathway” that systematically prepares your body and mind. We will explore why this trek is achievable for ordinary people, detail the three essential preparatory treks, analyse the route options, and demystify the two most critical elements for success: training and acclimatisation. This isn’t about hoping you’re ready; it’s about knowing you are.
To help you navigate this comprehensive guide, we’ve broken down the journey into clear, logical stages. The following summary outlines the key milestones we will cover, from building the right mindset to mastering the technicalities of high-altitude trekking.
Summary: Your Milestone-Based Path to Everest Base Camp
- Why Is Everest Base Camp Achievable for Ordinary People With Proper Preparation?
- How to Build Up to Everest Base Camp With 3 Preparatory Treks?
- Standard Route vs Gokyo Lakes Route: Which Everest Base Camp Approach for First-Timers?
- The Acclimatisation Error That Hospitalises 20% of Everest Base Camp Trekkers
- When to Attempt Everest Base Camp to Avoid Monsoons and Winter Extremes?
- How to Train for High-Altitude Trekking in 12 Weeks From Your Living Room?
- How to Acclimatise Properly When Ascending Above 4,000 Metres?
- How to Acclimatise Properly When Ascending Above 4,000 Metres?
Why Is Everest Base Camp Achievable for Ordinary People With Proper Preparation?
The first myth to dispel is that EBC is reserved for elite mountaineers or twenty-something athletes. The reality on the trail tells a very different story. With the right strategy, an astonishing number of prepared trekkers successfully reach Everest Base Camp, with success rates often cited between 80% and 95%. The key word here is “prepared,” and that preparation has less to do with your personal best 10k time and more to do with patience and pacing.
I’ll never forget an observation I made near Dingboche. A fit-looking 23-year-old half-marathon runner was visibly struggling, complaining of headaches and fatigue. Walking steadily just ahead of him was a 67-year-old retired dentist from Edinburgh, pausing occasionally to take photos, his breathing even and relaxed. This isn’t an anomaly; it’s the rule. The trail doesn’t reward explosive power; it rewards sustained, steady endurance. The dentist wasn’t “fitter” in a conventional sense, but he was better prepared for the specific demands of multi-day, high-altitude trekking. He understood pacing and had built a base of what I call trail-proven resilience.
This brings us to the core of the EBC challenge: it is not a technical climb. It is a long, strenuous walk at progressively high altitude. There are no ropes or vertical ice walls. The primary obstacles are the altitude and the cumulative fatigue of walking for 6-7 hours a day, for nearly two weeks. Therefore, the fitness benchmark is not about speed, but about durability. A good rule of thumb is this: if you can hike uphill for six hours carrying a 5-7kg pack for multiple days in a row, you possess the foundational fitness for Everest Base Camp. The rest is about smart acclimatisation and mental fortitude.
How to Build Up to Everest Base Camp With 3 Preparatory Treks?
The most effective way to build that trail-proven resilience is not through endless hours on a stair-climber, but by embarking on a progressive “Trekking Pathway.” This means tackling a series of preparatory hikes that systematically increase in difficulty, duration, and altitude. This approach does two things: it conditions your body for the specific stress of multi-day hiking and, just as importantly, it builds unshakeable mental confidence. Instead of one giant leap, you take three deliberate steps.
This pathway isn’t about specific brand-name treks, but about hitting key milestones. Your three-trek buildup should look something like this:
- The Foundation Trek (2-3 days, local): This is your starting point. Find a challenging local or regional trail that involves at least one overnight stay. The goal is to test your gear (especially your boots), practice carrying a 5-7kg pack, and experience the rhythm of hiking on consecutive days. This first step turns the abstract idea of a multi-day trek into a concrete reality.
- The Consolidation Trek (4-5 days, higher elevation): Now, you up the ante. This trek should involve more significant elevation gain and a longer duration. Think of a trek in a national park like the Rockies, the Alps, or the Sierra Nevada. You’re aiming to simulate the daily distances and ascent profiles of the EBC trail, teaching your body to recover overnight and go again.
- The Acclimatisation Trek (7+ days, above 3,500m/11,500ft): This is your dress rehearsal. A trek in a location like Peru, Colorado, or even a shorter trip to Nepal (like the Annapurna region) will expose you to true high altitude. This is where you practice your breathing techniques, monitor your body for early signs of AMS, and experience the feeling of reduced oxygen. After this trek, the altitudes of Namche Bazaar and Dingboche will feel familiar, not frightening.
This structured progression, ideally starting 3 to 6 months before your EBC departure, transforms your preparation from a guessing game into a deliberate, experience-led strategy. As one seasoned EBC guide from EBC Trek Guide notes, the value of this approach is undisputed: “We strongly recommend tackling a few shorter multi-day hikes first.”
This visual journey, from forested foothills to rocky ridges and finally to snow-dusted passes, is the mental model you should adopt. Each stage you complete is a layer of resilience baked in, ensuring that when you finally land in Lukla, you are not just a tourist with new gear, but a seasoned hiker ready for the final, crowning leg of your journey.
Standard Route vs Gokyo Lakes Route: Which Everest Base Camp Approach for First-Timers?
Once you’ve committed to the trek, a key decision arises: which path to take? For first-timers, the choice generally narrows down to two main options: the classic, direct route to Everest Base Camp and back, or the more challenging circuit via the stunning Gokyo Lakes and Cho La Pass. While both are incredible, they offer distinctly different experiences and demand different levels of commitment.
The Standard EBC route is the world-famous trail that follows the Khumbu Valley, ascending through Phakding, Namche Bazaar, Tengboche, and Dingboche to reach Base Camp before descending along the same path. It’s the most direct and popular option. The Gokyo Lakes route is a longer, more strenuous loop. It typically branches off after Namche Bazaar, heads to the turquoise Gokyo Lakes, crosses the formidable Cho La Pass (5,420m), and then rejoins the main trail to approach Base Camp. For a first-timer, understanding the trade-offs is crucial.
This table breaks down the key differences to help you make an informed decision based on your experience level and goals.
| Criteria | Standard EBC Route | Gokyo Lakes Route |
|---|---|---|
| Duration | 11-12 days | 15-16 days |
| Distance | ~106 km | ~135 km |
| Crowd level | Busier, most popular route | Quieter, less foot traffic |
| Key challenge | Sustained altitude on a linear out-and-back trail | Crossing Cho La Pass (5,420m), can be impassable with heavy snow in Dec-Jan |
| Signature highlight | Kala Patthar viewpoint | Gokyo Ri and turquoise glacial lakes |
For a true first-timer, the Standard Route is almost always the recommended choice. As a guide from Himalayan Wonders points out, “The acclimatization profile is more favorable to go to Everest Base Camp first.” The steady, linear ascent is easier for the body to adapt to. The Gokyo route, while rewarding, introduces a significant variable: the Cho La Pass. This high-mountain crossing involves scrambling over rock and ice for 7-9 hours and is a major step-up in physical and mental demand. While the sense of achievement is immense, it adds a layer of risk and difficulty that can be overwhelming for someone not yet accustomed to high-altitude trekking. The verdict is clear: save the Gokyo Lakes for your second trip to the Himalayas. Master the fundamentals on the classic route first.
The Acclimatisation Error That Hospitalises 20% of Everest Base Camp Trekkers
Let’s be direct: the single biggest threat to your Everest Base Camp trek is not a fall, not exhaustion, and not the cold. It is Acute Mountain Sickness (AMS). It’s a pervasive issue that, in its mild form, affects roughly half of trekkers on the Everest Base Camp trail at some point, regardless of their age or fitness. The critical, trip-ending error is not that AMS exists, but that trekkers ignore its early warnings and fail to practice active acclimatisation. Pushing onward with a headache in the hope it will just “go away” is the fastest way to get a helicopter ride back to Kathmandu.
The body is remarkable, but it needs time. As you ascend, the air pressure drops, and there are fewer oxygen molecules in every breath. Acclimatisation is the physiological process of your body adjusting to this reality by producing more red blood cells to carry oxygen more efficiently. This process cannot be rushed. The fatal error is treating scheduled “rest days” in places like Namche Bazaar and Dingboche as days to do nothing. This is a profound misunderstanding of their purpose. They are acclimatisation days, and they must be active.
The golden rule is an unbreakable mantra: “climb high, sleep low.” This principle is the cornerstone of safe high-altitude trekking. On an acclimatisation day, you must hike to a significantly higher altitude than where you plan to sleep, spend some time there, and then descend to your lodge for the night. This “stress-and-recover” cycle is the trigger that tells your body to start adapting. Ignoring this is the error that derails countless treks. Roughly 2-3% of trekkers with severe AMS may require evacuation, a situation that is almost always preventable by listening to your body and respecting this rule.
Every time you feel a persistent headache, nausea, or dizziness, you are standing at this fork in the road. One path leads up into the clouds, driven by ego and summit fever. The other leads down, back to a lower, safer altitude. The wise trekker knows that sometimes, the bravest decision is to take a step back, to descend and allow the body to heal. The mountain will still be there tomorrow.
When to Attempt Everest Base Camp to Avoid Monsoons and Winter Extremes?
Timing your Everest Base Camp trek is as crucial as your training. The Himalayas operate on a rhythm of distinct seasons, and choosing the right window can be the difference between glorious, sun-drenched vistas and cloud-choked valleys or dangerously cold conditions. While, as the EverTrek Knowledge Centre warns, Mount Everest has an “extremely unpredictable alpine climate,” there are two primary trekking seasons that offer the best balance of stable weather and comfortable conditions: Spring and Autumn.
The monsoon season (June to early September) should be avoided. Heavy rains can cause landslides, trails become muddy and treacherous, and the peaks are almost permanently shrouded in cloud. Likewise, the deep winter (late December to February) presents its own challenges, with extreme cold, closed teahouses, and the potential for snow-blocked passes, making it suitable only for highly experienced and well-equipped winter trekkers.
This leaves two optimal windows for the vast majority of trekkers. The following table outlines the pros and cons of each, helping you align the trip with your personal priorities—be it solitude, comfortable temperatures, or the best possible views.
| Season | Temperature profile | Pros | Cons |
|---|---|---|---|
| Spring (Mar-May) | Daytime highs 0-10°C at Base Camp, nights generally above -15°C | Dry, clear skies, blooming rhododendrons | Crowded, especially April-May |
| Autumn (Sep-Nov) | Comfortable days, colder nights | Very stable weather, excellent visibility | Peak crowds in October |
So which is better? It’s a matter of preference. Spring offers the beauty of the rhododendron forests in full bloom and the electric atmosphere of Everest climbing expeditions preparing at Base Camp. Autumn, particularly October and early November, is generally considered to have the most stable weather and the crispest, clearest air for photography. Both seasons are popular, so don’t expect to have the trails to yourself. However, for those seeking a sweet spot, the “shoulder seasons” can be a fantastic compromise. For example, late November brings clearer, quieter trails but colder nights above 4,000 metres. This can be a perfect option for trekkers who prioritise solitude and are prepared for colder temperatures.
How to Train for High-Altitude Trekking in 12 Weeks From Your Living Room?
While preparatory treks are the gold standard, your foundational fitness begins at home. The goal of your training plan isn’t to achieve peak athletic performance; it’s to build task-specific endurance. You are training your body to be comfortable with sustained, low-intensity effort over many consecutive days. A focused 12-week plan is more than sufficient for a person with a decent baseline of health.
Your training should revolve around four key pillars:
- Cardiovascular Endurance: This is the engine of your trek. Aim for 3-4 sessions per week of activities like jogging, cycling, swimming, or using a stair-climber. Start with 30-minute sessions and progressively build to 60-90 minutes. The focus is on duration, not speed.
- Strength Training: Your legs, core, and back will be doing the heavy lifting. Incorporate exercises like squats, lunges, step-ups, and planks 2-3 times per week. A strong core is your secret weapon for stability and preventing back pain from your daypack.
- Hiking-Specific Simulation: This is the most important part. Once a week, you need to go hiking. Find the hilliest terrain you can and walk for several hours, wearing the daypack you intend to use, loaded with 5-7kg (10-15 lbs) of weight. This is non-negotiable. It trains the exact muscles you’ll use and, crucially, gets your feet, ankles, and back used to the load. The ultimate benchmark? As one operator states, if you can walk fifteen kilometres with a seven-kilogram pack over hilly terrain without feeling utterly destroyed, you have the requisite fitness.
- Mental and Recovery Training: Don’t underestimate this. Practice breathing exercises to control your heart rate. And just as importantly, schedule at least one full rest day per week. Overtraining is a real risk and can lead to injury before you even leave home.
One guide’s experience highlights a common lesson: after an 8-week training plan heavy on generic cardio, the uphill sections on the actual trek still felt surprisingly tough. In hindsight, more time spent specifically on hills and trails would have been more effective. The lesson is clear: specificity matters more than intensity.
Action Plan: Implementing Back-to-Back Training Weekends
- Target Goal: About one month before your departure, your training should culminate in “back-to-back” hiking weekends to simulate consecutive trekking days.
- Day One (Strength Focus): Plan a hike with significant elevation gain (aim for at least 2,000-3,000 ft). Hike with your full target pack weight of around 20 lbs (9kg). Focus on steady pacing, not speed.
- Day Two (Endurance Focus): On the second day, use a lighter pack but aim for greater mileage. This teaches your body to perform even when slightly fatigued from the previous day’s effort.
- Recovery Protocol: After each back-to-back weekend, ensure you take a full recovery day. Listen closely to your body’s signals to avoid overtraining and injury.
- Progressive Integration: Start with shorter back-to-back days (e.g., 2 hours each day) and progressively build up the duration and elevation over the final 4-6 weeks of your training plan.
How to Acclimatise Properly When Ascending Above 4,000 Metres?
Once you cross the 4,000-meter (13,100-foot) threshold, typically around Dingboche or Pheriche, the rules of the game change. The air becomes noticeably thinner, and your body’s response to the altitude becomes the single most important factor for success. Proper acclimatisation in this zone is not a suggestion; it is a rigid discipline. This is where your preparation pays off, and your patience is truly tested.
Your primary strategy remains “climb high, sleep low.” This principle becomes even more critical at higher elevations. The acclimatisation day at Dingboche (4,410m) is a perfect example. A passive rest day is a wasted opportunity. The correct protocol is a slow, steady hike up the ridge towards Nangkartshang Peak (5,083m). You don’t need to reach the summit; the goal is to spend an hour or two above 4,800m before descending back to Dingboche to sleep. This exertion at altitude, followed by recovery at a lower elevation, is the most powerful signal you can send to your body to ramp up red blood cell production.
Beyond this golden rule, there are several other critical practices:
- Hydration and Diet: Stay relentlessly hydrated, aiming for 3-4 liters of water per day. Altitude can suppress your appetite, but you must continue to eat high-carbohydrate meals to fuel your body.
- Pacing: Slow down. Your pace above 4,000m should be deliberately slow, allowing you to walk and hold a conversation without gasping for air. If you can’t, you’re going too fast.
- Medical Aids: Prophylactic use of acetazolamide (Diamox) can help speed up the acclimatisation process. However, you must consult your doctor before your trip to discuss its suitability and potential side effects. It is an aid, not a cure, and it does not replace proper pacing.
Many guides will conduct daily health checks, often using a pulse oximeter to measure your blood oxygen saturation (SpO2) and heart rate. This simple, non-invasive check provides objective data on how your body is coping. A consistently low or falling SpO2 level is a clear, data-driven sign that you need to rest or even descend before proceeding higher.
Key takeaways
- Success on the Everest Base Camp trek is built on a foundation of progressive, milestone-based preparation, not on achieving elite athletic fitness.
- The non-negotiable “climb high, sleep low” principle is the cornerstone of safe and effective acclimatisation, transforming rest days into active adaptation days.
- Your greatest assets on the trail are patience and self-awareness. Pacing yourself and listening to your body’s early warning signs are more critical than speed or strength.
How to Acclimatise Properly When Ascending Above 4,000 Metres?
Understanding the “how-to” of acclimatisation is one half of the equation; the other is knowing how to recognize when it’s not working. No matter how perfectly you follow the rules, your individual physiology plays a role. As the CDC confirms, even on standard acclimatization schedules, altitude illness can affect close to 30% of trekkers at these higher elevations. Therefore, constant self-awareness and honest communication with your guide are your ultimate safety nets.
The most dangerous thing you can do is hide your symptoms out of a desire not to “slow the group down.” Your guide is trained to recognize the signs of AMS, but they are not a mind-reader. You must be vigilant in monitoring yourself for the earliest warning signs, especially on a day that involves a significant, forced ascent, such as the walk from Lobuche to Gorak Shep.
Be on high alert for these three early symptoms:
- Loss of appetite: A sudden or significant decrease in your desire to eat is often one of the very first indicators that your body is struggling.
- Unusual Fatigue: Feeling an exhaustion that is disproportionate to the day’s physical exertion. If you feel utterly drained after a relatively short or easy walk, take it seriously.
- Dizziness or Lightheadedness: Feeling unsteady on your feet, especially when standing up, is a clear warning sign.
If you experience any of these, along with a persistent headache, you must report it to your guide immediately. A mild headache can often be managed, but a combination of symptoms is a red flag. The good news is that with proper awareness and trained guides, severe outcomes are incredibly rare. As the Nepal Himalayas Trekking guide team assures trekkers, “Proper awareness, trained guides, and immediate descent make fatalities extremely rare.” Your safety lies in acknowledging the problem early, not in pushing through it.
Your journey to Everest Base Camp begins not at the trailhead in Lukla, but with the very first step you take in your training, the first preparatory hike you plan, and the commitment you make to a smart, progressive, and patient approach. By breaking this monumental goal into a series of achievable milestones, you transform an intimidating dream into a tangible, step-by-step plan. Start planning your personal Trekking Pathway today and take the first step towards standing in the shadow of the world’s highest peak.