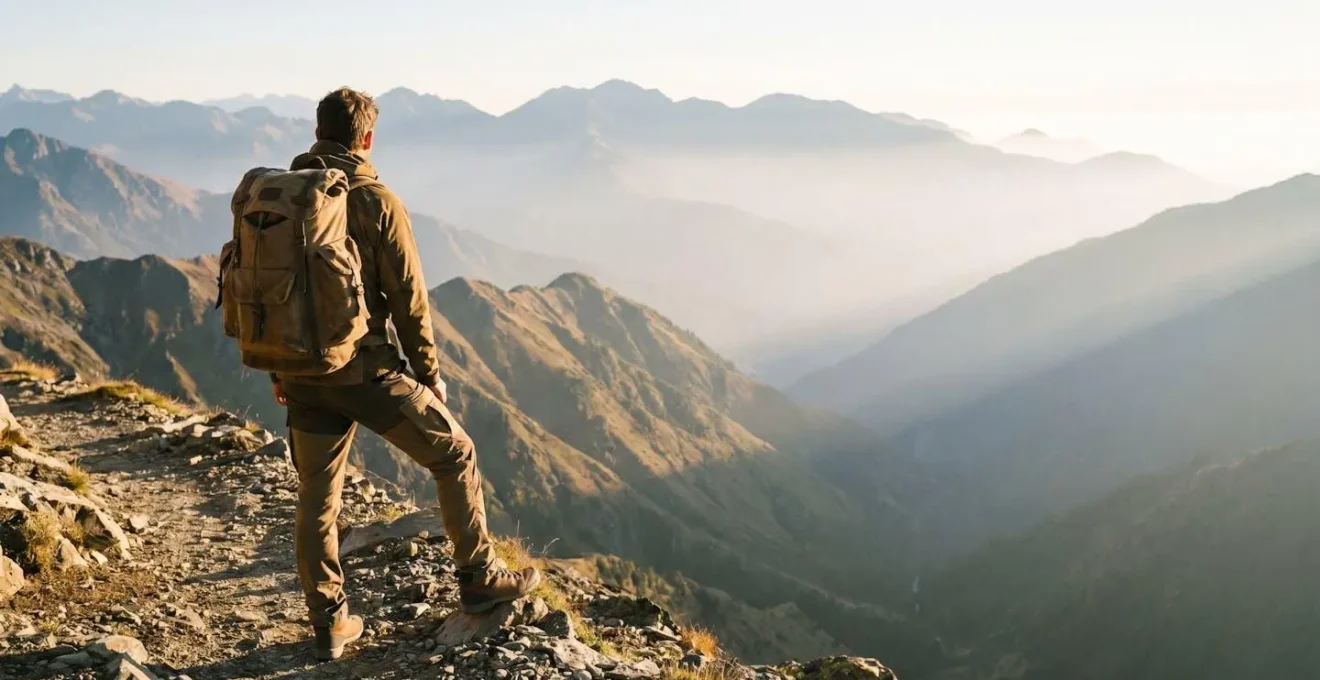
Hitting a “wall” on Day 3 of a trek isn’t a sign of poor fitness; it’s a symptom of a cumulative resource deficit. Minor, unaddressed shortfalls in energy, hydration, and sleep from the first 48 hours cascade into a system-wide failure. The secret to finishing strong lies not in pushing harder, but in mastering the art of in-trek resource management from your very first step, turning endurance into a sustainable practice rather than a battle of attrition.
There’s a moment familiar to almost every first-time multi-day trekker. It usually arrives 72 hours in. The initial excitement has faded, replaced by a profound, bone-deep weariness that feels less like simple tiredness and more like a system shutdown. This is the infamous “Day 3 wall,” a phenomenon that has cut more expeditions short than treacherous weather or faulty gear. Most aspiring adventurers blame their fitness, thinking they simply didn’t train hard enough. They’re told to “pack light” and “stay hydrated,” but this generic advice fails to address the core of the problem.
The truth I’ve seen play out over a hundred expeditions is that the Day 3 collapse is rarely about a single failing. It’s a crisis of compounding interest. Small, seemingly insignificant deficits from Day 1 and Day 2—a skipped snack, an hour of lost sleep, a slightly-too-fast pace to keep up—don’t just add up; they multiply. By the third morning, your body and mind are calling in a debt your bravado can no longer cover. This isn’t just about physical exertion; it’s a breakdown in resource management.
But what if the key wasn’t simply more pre-trek training, but a smarter in-trek strategy? What if you could anticipate and manage this cumulative deficit before it builds? This guide is built on that premise. We will dismantle the Day 3 wall brick by brick, not by focusing on what you do before the trail, but on how you manage your energy, recovery, and mindset *during* it. We’ll move beyond the platitudes to explore the science of pacing, the critical timing of nutrition, the non-negotiable rules of recovery, and the mental fortitude required to turn a struggle for survival into a journey of triumph.
To navigate this journey successfully, we will break down the essential strategies into a clear and actionable framework. This guide provides a comprehensive look at how to manage your body’s resources to ensure you not only start your trek, but finish it feeling capable and accomplished.
Summary: Mastering the Art of Multi-Day Trekking Endurance
- Why Does Day 3 Break Most First-Time Multi-Day Trekkers?
- How to Pace Yourself on Multi-Day Treks to Finish Strong?
- What Recovery Techniques Work During Consecutive Trekking Days?
- The Nutrition Mistake That Depletes Energy by Day 4 of Long Treks
- When to Schedule Rest Days on 7+ Day Trekking Expeditions?
- How to Acclimatise Properly When Ascending Above 4,000 Metres?
- Cardio vs Strength Training: Which Matters More for Himalayan Treks?
- How to Acclimatise Properly When Ascending Above 4,000 Metres?
Why Does Day 3 Break Most First-Time Multi-Day Trekkers?
The Day 3 wall isn’t a myth; it’s a predictable physiological and psychological event. On Day 1, adrenaline and novelty are powerful fuels. You push a little too hard, enjoying the views and the feeling of freedom. On Day 2, you wake up slightly sore but motivated, and you repeat the pattern, drawing further from your energy reserves. By the morning of Day 3, the cumulative effect hits. Your glycogen stores are depleted, micro-tears in your muscles have accumulated, and the initial mental buzz has worn off. This is the cumulative deficit in action.
It’s a cascade failure. The physical exhaustion makes simple tasks feel monumental, which in turn erodes your mental resilience. A small hill that would have been a minor challenge on Day 1 now feels like a mountain. This mental fatigue is just as debilitating as the physical. As veteran adventurer Ian Finch notes in Much Better Adventures Magazine, it’s a battle of the mind:
I was once told in my early days in Commando training that “the mind moves the body” so if we prepare the mind with knowledge and a flexible and positive outlook to training, the body will follow suit in the way that we want.
– Ian Finch, Much Better Adventures Magazine
This image captures the essence of that moment: it’s not a dramatic injury, but a quiet, internal collapse where the will to continue simply runs out.
The crucial mistake is viewing each day in isolation. A successful multi-day trekker thinks of their energy, hydration, and nutrition not as a daily budget, but as a single, continuous pool of resources for the entire journey. Every decision, from how fast you walk the first mile to whether you eat that snack, has consequences 48 hours later. Understanding this is the first step to dismantling the wall before you even hit it.
How to Pace Yourself on Multi-Day Treks to Finish Strong?
Pacing is the most critical and misunderstood skill in endurance trekking. It’s not about being slow; it’s about being sustainable. The goal is to finish each day feeling like you could have done more, preserving that surplus for the days to come. Most beginners start too fast, caught up in the excitement, effectively burning through their limited glycogen stores in the first few hours. A successful pace is one that feels almost too easy at the beginning. It should be conversational—if you can’t hold a conversation, you’re going too hard.
A tangible benchmark is helpful. On a well-maintained trail, a conditioned hiker can expect to cover between two and three miles per hour (3.2-4.8 km/h). If you find yourself consistently exceeding this, you are likely redlining. Use this as a guide, not a rule, and adjust for terrain and pack weight. Your body is the ultimate authority. Listen to your breathing; it’s your most honest pacer. Try to match your breath to your steps—for instance, inhale for three steps, exhale for three steps. As the terrain steepens, this rhythm will naturally shorten, but the principle of controlled, rhythmic breathing remains.
Trekking poles are not a crutch; they are a pacing tool. They help you establish and maintain a steady rhythm, especially on ascents, and transform your body into an all-wheel-drive machine. On descents, they are even more critical. By using poles, you absorb significant downward forces, saving your quadriceps from the eccentric muscle damage that is a primary cause of next-day soreness. This keeps your legs fresher for longer, directly combating the cumulative fatigue that builds towards Day 3.
Finally, pacing includes strategic breaks. Don’t wait until you’re exhausted. A short, 5-10 minute break every hour to drink water, adjust your pack, and stretch is far more effective than a long, infrequent stop. On long descents, this is even more important; take short breaks every 20-30 minutes to give your leg muscles a chance to recover from the constant braking force. This proactive approach to rest is a core tenet of effective resource management.
What Recovery Techniques Work During Consecutive Trekking Days?
What you do in the hours after you stop hiking is just as important as what you do on the trail. This is where you either begin to pay back the day’s energy debt or let it roll over, compounding the problem for tomorrow. Recovery isn’t passive; it’s an active process of refueling, rehydrating, and repairing. As the team at Hike Before Destination wisely puts it, true endurance is a game of management.
Endurance isn’t about pushing nonstop—it’s about managing recovery between days.
– Hike Before Destination editorial team, How to Build Endurance for Multi-Day Trekking? – HBD
Your first priority upon reaching camp is rehydration. Dehydration is a primary driver of fatigue, headaches, and muscle cramps. You lose more water on a multi-day trek than you think due to exertion, sun exposure, and higher elevation. Don’t just drink until you’re not thirsty; aim to drink consistently until your urine is a pale yellow colour. This is your most reliable indicator of proper hydration.
Next is refueling, a topic we’ll cover in-depth, but the immediate post-hike window is crucial for replenishing muscle glycogen. Follow this with muscle care. Gentle stretching of major muscle groups—quads, hamstrings, calves, and glutes—can help reduce stiffness. Hold each stretch for 30 seconds without bouncing. An often-overlooked but highly effective technique is elevating your legs. Lying down with your feet propped up against a tree or your pack for 10-15 minutes helps reduce swelling and improves circulation.
For more advanced recovery, many long-distance hikers swear by compression socks. Wearing them for a few hours in the evening can aid muscle recovery by improving blood flow and reducing inflammation. Finally, the ultimate recovery tool is sleep. Quality sleep is when your body does its most significant repair work. Prioritize getting a full night’s rest, as this is non-negotiable for multi-day performance. These small, deliberate actions are the difference between waking up stiff and depleted on Day 3 versus feeling ready for the trail ahead.
The Nutrition Mistake That Depletes Energy by Day 4 of Long Treks
The single biggest nutrition mistake I see on the trail is not what people eat, but *when* they eat it. Many trekkers eat a large meal at the end of the day and snack sporadically, but they miss the most important metabolic opportunity: the post-exercise refueling window. Your muscles are like sponges after a long day’s hike, primed to absorb nutrients and replenish their depleted energy stores (glycogen). Missing this window is a primary cause of the deep, unshakable fatigue that sets in around Day 3 or 4.
As sports dietitian Jenna Braddock explains, your body is uniquely receptive right after a workout. “You produce an enzyme that stimulates the production of glycogen more rapidly, which benefits you by having more energy to draw from for future workouts.” The science backs this up: research on glycogen resynthesis shows that there’s a critical first phase lasting 30-60 minutes post-exercise where your muscles can absorb carbohydrates at an accelerated rate. While a second, slower phase lasts up to 48 hours, maximizing this initial window is key to preventing a cumulative energy deficit.
This is what that critical refueling looks like on the trail: a handful of trail mix, a piece of dried fruit, or a small energy bar.
So, what does this mean in practice? Within 30 minutes of taking your pack off, you must consume a snack rich in carbohydrates and containing some protein. This isn’t your dinner; it’s a recovery appetizer. A simple 4:1 ratio of carbs to protein is a good target. This could be a handful of trail mix with nuts and dried fruit, a protein bar, or chocolate milk if available. Waiting until you’ve set up your tent, unpacked, and cooked a full dinner two hours later means you’ve missed the peak absorption window. Doing this for two consecutive days guarantees you’ll start Day 3 with a significant glycogen shortfall, regardless of how big your dinner was.
When to Schedule Rest Days on 7+ Day Trekking Expeditions?
On treks lasting a week or more, a rest day—or “zero day” in thru-hiker parlance—is not a luxury; it’s a strategic necessity. A zero day is a full day with zero trail miles. Its purpose is to allow for a deeper level of physical and mental recovery than is possible overnight. However, the timing is crucial. Taking it too early can feel unnecessary, while taking it too late means you’re already in a deep recovery hole. A common rule of thumb is to plan a zero day after every 5 to 7 days of strenuous hiking.
But a rest day is not about doing nothing. In fact, they can be surprisingly busy. It’s the day to handle logistics: resupply food, wash clothes, repair gear, and contact family. A proper zero day is also about calories. It’s your best opportunity to combat the inevitable calorie deficit of trekking by eating large, nutrient-dense meals. As one Backpacker Magazine contributor humorously quoted, there’s a kernel of truth in the idea that `”you need a zero day to recover from a zero”`, because the chores and eating can be tiring in their own right!
For those who feel antsy doing nothing, a “nearo” (near-zero) is an excellent compromise. This involves hiking a very short distance, perhaps just a few miles in the morning, to a town or a particularly scenic campsite, and then taking the rest of the day off. This strategy blends movement with recovery, preventing stiffness while still allowing for significant rest and logistical catch-up. Deciding between a zero and a nearo depends on your body’s state and your logistical needs. If your legs are shot and you have a long list of chores, a full zero is the wise choice.
Planning these days in advance is smart, but flexibility is key. If an opportunity for a great rest spot appears on Day 4 and you feel you need it, take it. Listening to your body is more important than sticking to a rigid schedule. A well-timed rest day can completely reset your physical and mental state, making the second half of your journey feel as strong as the first.
Your Action Plan for a True “Zero Day”
- Triage Your Chores: List all essential tasks—resupply, laundry, gear repair, communications—and tackle them first to free up mental space.
- Prioritize Caloric Intake: Focus on eating large, frequent, and nutrient-dense meals. This is your chance to reverse the calorie deficit from the trail.
- Practice Active Recovery: Engage in gentle stretching, elevate your legs to reduce swelling, and take care of any hotspots or blisters on your feet.
- Maximize Quality Sleep: Aim for extra sleep, including a nap if possible. This is when your body performs its most critical repairs.
- Assess and Plan: Use the downtime to review your maps, check weather forecasts, and adjust the plan for the upcoming days based on how your body feels.
How to Acclimatise Properly When Ascending Above 4,000 Metres?
Once your trek takes you above 3,000 metres (approx. 10,000 feet), you enter a new dimension of resource management: acclimatisation. At these elevations, the lower partial pressure of oxygen means your body has to work harder to get the oxygen it needs. Proper acclimatisation is the process of allowing your body to gradually adapt to this. Rushing this process is not only dangerous but is a guaranteed way to end your trek, as Acute Mountain Sickness (AMS) can affect anyone, regardless of age or fitness.
The golden rule is to ascend slowly. If possible, avoid flying or driving directly to high altitude. Instead, start your trek below 3,000 metres and walk up. If you must arrive at altitude quickly, you must spend the first 24 hours with minimal exertion. This allows your body to begin the acclimatisation process without the added stress of hiking. The most critical guidelines come from medical experts; for instance, the CDC Yellow Book on altitude travel notes that the Wilderness Medical Society has clear recommendations. A key one is to not increase your sleeping altitude by more than 500 metres (1,650 ft) per night once you are above 3,000 metres.
This wide, barren landscape is typical of the environment where these rules become non-negotiable.
Another core principle is the mountaineer’s maxim: “climb high, sleep low.” This is a highly effective acclimatisation strategy. It involves hiking to a higher altitude during the day and then returning to a lower elevation to sleep. This exposes your body to the stress of higher altitude for a short period, stimulating adaptation, but allows it to recover in a more oxygen-rich environment overnight. Additionally, you should plan an extra rest day—a full day at the same altitude—for every 1,000 metres (3,300 ft) you ascend. This gives your body a crucial 24-hour window to catch up and solidify its adaptations before you push higher.
Cardio vs Strength Training: Which Matters More for Himalayan Treks?
For decades, aspiring trekkers were told that cardiovascular fitness was everything. Hours on the treadmill or bike were seen as the gold standard for preparation. While cardio is undoubtedly important for heart and lung efficiency, an overemphasis on it ignores the true source of muscle fatigue and breakdown on long treks: the descents. The relentless pounding of downhill sections is what truly shreds your leg muscles, particularly your quadriceps. This is where strength training, specifically for load-bearing and stability, becomes the more critical factor for multi-day endurance.
The reason lies in biomechanics. When you walk uphill, your muscles perform concentric contractions (shortening as they work). When you walk downhill, they perform eccentric contractions (lengthening under load to act as brakes). This eccentric loading creates significantly more micro-damage to the muscle fibres, leading to greater next-day soreness, known as Delayed Onset Muscle Soreness (DOMS).
Case Study: The Hidden Damage of Downhill Walking
The impact of eccentric loading is not just anecdotal. A controlled study on healthy subjects found that next-day muscle soreness was markedly higher after downhill walking than after uphill walking. This occurred even though heart rate and perceived fatigue were lower during the downhill exercise. The study concluded that the braking action of the quadriceps and lower-leg muscles during descent creates greater mechanical stress and muscle damage than the propulsive action of climbing. This highlights why hikers can feel relatively fine during a descent but wake up the next day with debilitating soreness, contributing directly to the Day 3 wall.
Therefore, your training should focus on building a robust “chassis” capable of handling these braking forces. This means prioritizing leg-strength exercises like squats, lunges, and step-downs. To make this training trail-specific, it’s essential to train with the same backpack weight you plan to carry. This teaches your core and stabilizer muscles to manage the load. Finally, once you have a solid base, simulate the multi-day effect by hiking on two consecutive days, even if they are shorter hikes. This trains your body to recover and perform with residual fatigue, which is the very essence of a long trek.
Key takeaways
- The “Day 3 Wall” is a predictable failure of resource management, not a simple lack of fitness.
- Mastering in-trek recovery, nutrition timing, and pacing is more critical than pre-trek training alone.
- Strength training for eccentric load (descents) is the overlooked key to preventing cumulative muscle damage and soreness.
How to Acclimatise Properly When Ascending Above 4,000 Metres?
Following the rules of gradual ascent is your best defense against Acute Mountain Sickness (AMS), but it is not a guarantee. It’s equally important to know how to recognize the early symptoms in yourself and your trekking partners. Ignoring them is a dangerous gamble. The most common early signs are often subtle and can be mistaken for general trail fatigue: a persistent headache, nausea or loss of appetite, dizziness, and unusual fatigue. The key differentiator is the headache. A headache that develops at altitude and doesn’t resolve with hydration and mild painkillers is the cardinal sign of AMS.
To help standardize diagnosis, medical professionals use a system. For instance, under the standardized Lake Louise scoring system, a headache at altitude combined with other symptoms adding up to a score of 3 or more is formally diagnosed as AMS. While you won’t be performing a clinical diagnosis on the trail, knowing that a headache plus one or two other symptoms is the red flag is crucial. Be cautious if you feel fine on day 2 or 3; many hikers push too hard early on and only feel the consequences of their rapid ascent on day 4 or 5, when they are higher and further from help.
The absolute, non-negotiable rule if you suspect you or someone else has AMS is: do not ascend any higher. Stop. Rest at your current altitude. In most cases of mild AMS, an extra day of rest at the same elevation is enough for the body to catch up and for symptoms to resolve. If symptoms worsen or do not improve after 24 hours, you must descend. Descending by as little as 300-500 metres can bring significant and rapid relief. Pushing higher with active AMS symptoms is how mild cases become severe, life-threatening conditions like High-Altitude Cerebral Edema (HACE) or High-Altitude Pulmonary Edema (HAPE).
Listen to your body with complete honesty. Altitude is the great equalizer, and ego has no place in the mountains. Acknowledging symptoms early and taking decisive action is not a sign of weakness; it is the hallmark of a smart, experienced mountaineer. Your summit is a goal, but your life is the priority.
By shifting your focus from brute force to intelligent resource management, you transform a multi-day trek from a battle against your body to a partnership with it. You can beat the Day 3 wall and cross the finish line with energy to spare, ready for the next adventure. Assess your own readiness and start planning your training with these principles in mind.