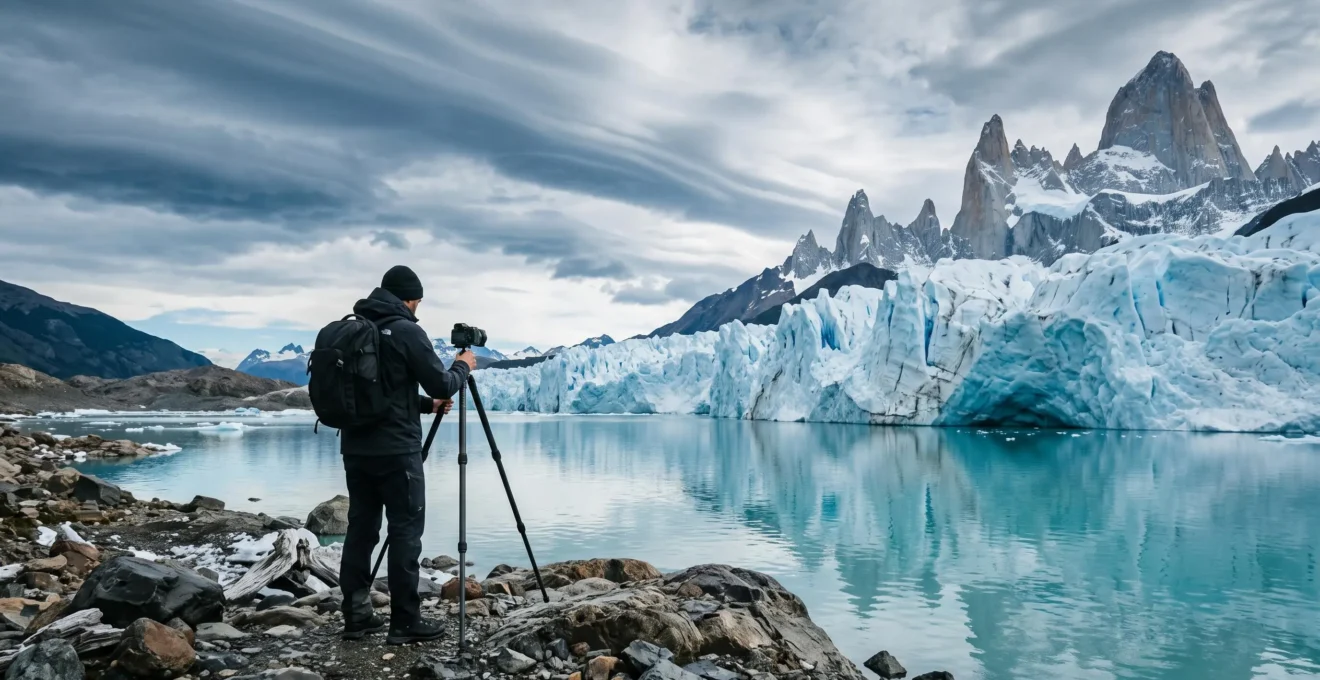
In summary:
- Success in Patagonian glacier photography hinges on adapting to the environment, not just following rigid technical rules.
- The primary mistake is trusting your camera’s meter on bright ice; you must manually underexpose to preserve the deep blues and textures.
- Lens choice is a narrative decision: use a wide-angle for immense scale and a telephoto to isolate abstract patterns and compress distant peaks.
- An expedition ship with Zodiacs provides unparalleled access to remote glacier faces, enabling unique compositions impossible from crowded viewpoints.
Standing before a Patagonian glacier is a lesson in humility. It’s not just the colossal scale or the impossible shades of blue; it’s the sound—a deep, resonant creaking that speaks of immense pressure and perpetual movement. For a photographer, the impulse is to capture this sublime power. Yet, the region’s notoriously volatile weather often turns this ambition into a battle for a usable shot. Standard advice to “bring a tripod” or “use a polarizing filter” feels woefully inadequate when facing four seasons in a single hour, from brilliant sun reflecting off a sea of ice to sudden, slate-grey squalls.
Many guides focus on gear, but the real challenge in Patagonia isn’t what’s in your camera bag—it’s what’s in your head. The key to moving beyond generic postcards and creating truly dramatic glacier photography lies in a fundamental shift in mindset. Instead of fighting the conditions, you must learn to read them, anticipate their changes, and use their volatility as a creative tool. The secret isn’t in a specific setting, but in the art of environmental adaptation.
But what if the true essence of Patagonian ice isn’t just its scale, but also its intricate, abstract detail? This guide is built on that premise. We will move beyond the basics to explore how the unique physics of glacial ice and the region’s specific quality of light dictate every technical choice you make. We’ll delve into the narrative power of your lens selection, solve the exposure puzzle that ruins most ice photos, and understand how your choice of travel—from accessible boardwalks to nimble expedition ships—ultimately defines the images you can create. This is your manual for turning Patagonia’s challenges into your greatest photographic assets.
To help you master this unique environment, this guide breaks down the essential knowledge into distinct, actionable sections. We will explore everything from the science behind the spectacle to the practical decisions you’ll make in the field.
Table of Contents: A Photographer’s Roadmap to Patagonian Glaciers
- Why Do Patagonian Glaciers Offer Photography Impossible Anywhere Else on Earth?
- How to Photograph Glaciers in Patagonia’s Unpredictable Weather Conditions?
- Wide-Angle vs Telephoto: Which Lens Captures Patagonian Glacier Scale Best?
- The Exposure Mistake That Ruins 80% of Bright Glacier Photographs
- When Does Patagonian Light Create the most Dramatic Glacier Photography?
- Why Do Expedition Ships Offer Experiences Impossible on Ocean Liners?
- Why Do Remote Destinations Offer Experiences Impossible in Accessible Tourist Spots?
- How to Choose Between Luxury and Adventure-Focused Expedition Ships?
Why Do Patagonian Glaciers Offer Photography Impossible Anywhere Else on Earth?
Patagonia is not just another location with glaciers; it is a dynamic theatre where ice, rock, and light conspire to create scenes of unparalleled drama. Unlike many of the world’s receding ice fields, some Patagonian glaciers are in a state of equilibrium or even advancing, offering a visceral display of nature’s power. The Perito Moreno Glacier, for instance, is a living entity. A park guide reveals that it advances roughly 2 meters per day, leading to the spectacular calving events that define the experience. This constant motion provides a photographic opportunity that is both thrilling and fleeting.
The true uniqueness, however, lies in the confluence of elements. It’s the otherworldly granite peaks of the Fitz Roy and Cerro Torre massifs piercing the sky behind a field of fractured ice. It’s the sheer diversity of textures and colors within the ice itself. Here, light acts as a sculptor, revealing everything from the deepest, most compressed blues to subtle greens from algae blooms and dark streaks of volcanic ash. This complexity makes it an ultimate playground for photographers seeking more than just a white landscape.
As one resident photographer in Torres del Paine notes, the landscapes are in a state of constant flux, with a complexity of light and backgrounds that make it one of the best, and most challenging, places to shoot on Earth. This is not a static subject. It’s a place where you can capture the raw power of geology, the transient beauty of light, and the intimate, abstract story written in ancient ice, all within a single frame.
How to Photograph Glaciers in Patagonia’s Unpredictable Weather Conditions?
Photographing in Patagonia is an exercise in surrender and rapid response. The region’s infamous winds and fast-moving weather systems mean that a meticulously planned shot can vanish in moments. The key is not to fight the conditions but to embrace them as part of the narrative. A dramatic, cloud-filled sky often creates more compelling images than a simple blue one, as the diffuse light softens the harsh reflections off the ice and enhances the blue tones within it. Your primary task is to be prepared for anything, which means having your gear protected and your technique fluid.
One critical aspect to remember is that you’ll be working without aerial support. In places like Los Glaciares National Park, home to the Perito Moreno Glacier, there is a strict ban on both pets and drones. This forces a return to fundamental, ground-based photography skills, relying on your choice of lens and position to convey scale and drama. Whether from a park walkway or a boat, your ability to read the environment and anticipate events like a calving becomes paramount. The best shots often come not from a planned composition but from patient observation and a quick reaction to the glacier’s own rhythm.
Success requires a disciplined field workflow. Rather than hiking with your camera packed away, keep it accessible, fitted with a versatile lens, and protected by a rain cover. When you find a promising location, especially one where ice calving seems imminent, the game is one of waiting. The afternoon is often a prime time, as the sun has warmed the glacier’s face, making it more likely to shed massive walls of ice into the lake below. When the moment comes, it happens in a flash; being ready is everything.
Your Field Audit Checklist: Preparing for the Unpredictable
- Points of Contact: Constantly monitor all key environmental signals. This includes wind direction, the speed and type of cloud movement, and the audible cracks and groans from the glacier itself, which often precede a calving.
- Gear Collection: Inventory your gear for rapid deployment. Your camera with a versatile zoom lens should be on a strap, a rain cover already fitted, and your tripod (if used) should be set up for quick adjustments, not packed away.
- Creative Coherence: Confront your camera settings—aperture, shutter speed, and ISO—with the current light and your desired creative effect. Are you trying to freeze the splash of a calving (fast shutter) or smooth the water (long exposure with an ND filter)?
- Compositional Mémorability: Evaluate your frame for unique elements versus generic postcard shots. Actively look for strong foreground interest, leading lines in the ice, or a compelling human element to convey scale. Don’t just point at the middle of the glacier.
- Integration Plan: Be prepared to move. As the light or weather shifts, adjust your position and lens choice to integrate the new conditions into your shot, rather than waiting for the “perfect” moment that may never arrive.
Wide-Angle vs Telephoto: Which Lens Captures Patagonian Glacier Scale Best?
The question of which lens to use for glacier photography is not about finding a single “best” option, but about deciding what story you want to tell. Your focal length is a narrative choice. A wide-angle lens excels at immersing the viewer in the environment, capturing the immense scale of the glacier in relation to the sky, mountains, and any foreground elements. It’s the lens for the epic, establishing shot that says, “I was there, and it was vast.”
A wide-angle, however, can sometimes fail to convey the sheer power and texture of the ice face itself. This is where a telephoto lens becomes an essential creative tool. By zooming in, you can isolate abstract patterns, textures, and color variations that are invisible to the naked eye. A telephoto also has the powerful effect of compressing perspective, making distant mountain peaks behind the glacier appear closer and more imposing, creating a layered, dramatic composition. It allows you to transform a massive landscape into an intimate, painterly abstract. A fine art photographer demonstrated this by using a Zodiac to explore a narrow channel, using a longer lens to capture geological features and intimate textures, proving a telephoto can find art within the ice.
Ultimately, a versatile approach is best. A standard zoom (like a 24-70mm) will be your workhorse, but having both a wide-angle (10-24mm) and a telephoto (75-135mm or longer) in your bag allows you to switch from an environmental narrative to an abstract one in seconds. For capturing the explosive action of a calving event from a safe distance, a super-telephoto with a teleconverter can be invaluable. The choice depends entirely on whether your focus is the overwhelming scale or the intricate details.
The following table, based on field-tested recommendations from landscape photographers, breaks down the ideal use case for each lens type. An analysis of field-tested focal length recommendations provides a clear framework for these choices.
| Lens Type | Recommended Focal Length | Best Use Case |
|---|---|---|
| Wide-Angle | 10-24mm | Immersive environmental context, dramatic skies and foreground rocks |
| Standard Zoom | 24-70mm | General landscape framing and versatile day-to-day shooting |
| Telephoto | 75-135mm | Isolating the glacier face and compressing layers of ice and peaks |
| Super-Telephoto | 150mm+ with teleconverter | Freezing the action of a sudden calving event from a safe distance |
The Exposure Mistake That Ruins 80% of Bright Glacier Photographs
The single most common technical failure in glacier photography is improper exposure. The vast, bright surfaces of ice and snow consistently fool a camera’s light meter. Your camera is programmed to see the world as a “middle grey,” so when it sees a scene dominated by brilliant white and blue, it tries to darken it to that average. The result is a dull, greyish, underexposed image that completely loses the glacier’s luminosity and vibrant color. Relying on your camera’s automatic or semi-automatic modes without intervention is a recipe for disappointment.
The problem extends beyond simple brightness to color accuracy. The way a camera interprets the color white has massive ramifications on the final photo. According to photography travel experts, even in ideal conditions, cameras tend to get white balance right only 70-80% of the time. On a glacier, where the light is a complex mix of direct sun, blue-sky reflections, and bounced light from the ice itself, that failure rate is even higher. Leaving your white balance on “Auto” often results in images with an unnatural blue or yellow cast.
The solution requires you to take manual control. First, check your histogram religiously. It is the only true judge of exposure, not the image on your LCD screen (which can be misleading in bright light). For a bright glacier scene, the histogram should be pushed to the right, but without “clipping” (spiking against the far-right edge), which indicates blown-out highlights that have lost all detail. To achieve this, you will often need to dial in positive exposure compensation (+0.7 to +2 stops) or, better yet, shoot in full manual mode. Second, set a custom white balance or shoot in RAW format. A RAW file captures all the color data, allowing you to correct any color cast perfectly in post-processing without losing quality.
I use a ND filter (ND 64 | 77mm) and a Manfrotto tripod for long exposures and timelapse photography.
– Resident Patagonia Photographer, Ecocamp Patagonia Blog
For more advanced techniques, especially when you want to capture the motion of clouds or water against the static ice, Neutral Density (ND) filters are essential. As one photographer in the field explains, using a strong ND filter allows for long exposures even in bright daylight, turning a simple snapshot into a more ethereal and artistic image. This is a deliberate creative choice that moves beyond simple documentation.
When Does Patagonian Light Create the most Dramatic Glacier Photography?
In Patagonia, light is not merely illumination; it is the main character in the drama. The quality, color, and angle of light can transform a glacier from a flat, white mass into a multi-faceted jewel of incredible depth and color. Timing your shoot to coincide with the most dramatic light is as important as any technical setting. While the “golden hours” of sunrise and sunset are universally prized, their character changes profoundly with the seasons in Patagonia.
The season you choose to visit dictates the type of light you’ll be working with. Each period offers unique photographic opportunities:
- Summer (November to February): This is the season of endless light. With up to 17 hours of daylight in December, you have extensive opportunities for shooting. The light is often harsh midday but provides long, drawn-out sunrises and sunsets, giving you more time to work during the golden hours.
- Autumn (late March to May): Many photographers consider this the best season for light. The sun sits lower in the sky, creating a warmer, more angled light throughout the day. The sunrises and sunsets during this period are often intensely red and pink, and the changing colors of the sparse Lenga and Ñire forests add a beautiful contrast to the blue ice.
- Winter & Spring: These seasons offer their own stark beauty. While the weather is more challenging, fresh snowfalls can create pristine, minimalist landscapes. The nights are longest in winter, offering the best chances for astrophotography, though clear skies are a rare and precious gift.
Don’t neglect the potential of the night. On a clear, moonless night, the skies over Patagonia are among the darkest on Earth, making it a prime location for capturing the Milky Way. As renowned photographer Paul Reiffer suggests, a shot of the galaxy arching over a moonlit landscape like the town of El Chaltén can be an image of a lifetime. To achieve this, checking a moon calendar is essential to balance the light from the moon (which illuminates the mountains) with the darkness needed to reveal the stars.
Shoot the galaxy above the moonlit town of El Chaltén.
– Paul Reiffer, Patagonia Photography Workshop
Why Do Expedition Ships Offer Experiences Impossible on Ocean Liners?
The fundamental difference between an expedition ship and a traditional ocean liner lies in a single word: access. While a large cruise ship offers a panoramic view of the Patagonian coast from a distance, a smaller, purpose-built expedition vessel is a key that unlocks intimate, up-close encounters with the region’s wildest places. Their smaller size and reinforced hulls allow them to navigate narrow fjords and get closer to glacier faces that are completely inaccessible to larger ships.
The most significant advantage is the use of Zodiacs (rigid inflatable boats). These nimble crafts are launched directly from the ship, allowing small groups of passengers to leave the main vessel behind and explore at sea level. This is where the real photography begins. A Zodiac can take you right up to the face of a stunning wall of ice like the Garibaldi Glacier, allowing you to fill your frame with its texture and scale. You can navigate through a maze of “brash ice” and “bergy bits,” finding abstract compositions and capturing the incredible blue glow of the ice from just feet away. This is an immersive, sensory experience—feeling the cold air, hearing the crackle of the ice, and hoping to witness the thunderous roar of a calving event—that simply cannot be replicated from the deck of a ship holding thousands of people.
Furthermore, the entire philosophy of an expedition ship is different. The focus is on off-ship exploration and education, not onboard entertainment. The guest-to-guide ratio is typically very low, and these guides are often experts in geology, marine biology, and photography. As Quark Expeditions highlights for their programs, small Zodiac groups are often led by the same guide each day, who provides professional photography advice and feedback both during outings and in post-excursion workshops. This transforms the trip from a passive sightseeing tour into an active, hands-on photographic workshop in one of the world’s most incredible natural studios.
Why Do Remote Destinations Offer Experiences Impossible in Accessible Tourist Spots?
In an age of over-tourism, the greatest luxury a photographer can have is solitude. Accessible “trophy shot” locations, while beautiful, often come with a price: crowds. The main viewing platforms for the Perito Moreno Glacier, for example, are a marvel of engineering but must accommodate the more than 300,000 visitors who flock there annually. Capturing a unique image from a crowded boardwalk, where everyone is vying for the same iconic view, is an immense challenge. You are confined to a set path and a pre-determined perspective.
Remote destinations, reached by expedition ship or on a challenging trek, offer the antithesis of this experience. They provide the opportunity for a personal and unscripted encounter with the landscape. One photographer recounts a Zodiac landing in the Chilean fjords during a steady rain, scrambling up a steep, muddy hillside to gain an intimate view of a sprawling glacier. The scene, with its silvered trees twisted by the wind and the glacial ice glowing an intense blue beneath heavy clouds, felt otherworldly—a moment of raw, untamed nature impossible to find amongst a crowd.
This remoteness allows for a deeper sensory immersion, which can translate into more powerful photography. Without the noise of hundreds of tourists, you can truly hear the landscape. One photographer on a social media feed used a high-quality audio recorder to capture the deep, explosive sounds of a calving glacier, adding an entirely new dimension to the visual experience. It’s in these quiet, remote moments that you can move beyond simply documenting a place and begin to capture its atmosphere and soul. You have the time and space to experiment with compositions, wait for the perfect light, and create an image that is uniquely yours, not one that has been taken a million times before.
Key takeaways
- Adaptation Over Automation: The most crucial skill for Patagonian photography is reading the environment and manually controlling your camera’s exposure and white balance, as automatic settings will consistently fail in the face of bright, reflective ice.
- Lens as a Narrative Tool: Your choice of a wide-angle or telephoto lens is a creative decision that defines your story. Use a wide lens for epic scale and a telephoto to isolate the intimate, abstract beauty hidden within the ice.
- Access Defines the Image: While accessible viewpoints offer stunning vistas, true photographic freedom and unique compositions are found in remote locations, often requiring an expedition ship with Zodiacs to get up close to the glacier face.
How to Choose Between Luxury and Adventure-Focused Expedition Ships?
Once you’ve decided on an expedition ship, the next choice is between a luxury-oriented vessel and one focused purely on adventure. This decision impacts not just your comfort, but potentially your photographic opportunities. It’s not a simple matter of “good” versus “bad,” but of aligning the ship’s philosophy with your personal priorities as a photographer. A luxury expedition ship combines high-end comfort with deep exploration, offering spacious cabins, gourmet dining, and amenities like spas and gyms, all while carrying fewer passengers than a mainstream cruise line.
An adventure-focused ship, by contrast, is often more rugged and utilitarian. The emphasis is squarely on maximizing time ashore and providing a platform for serious exploration. Cabins may be smaller and more functional, and dining is hearty rather than gourmet. For a photographer, the critical question is: what do you value more? Onboard comfort to relax and edit photos in, or a potentially more flexible itinerary that prioritizes expeditionary goals over a fixed dining schedule? As one traveler noted, some lines like Ponant strike an excellent balance, but the spectrum is wide.
However, the most important factor for a photographer might not be the thread count of the sheets, but the quality of the expedition team. When choosing a ship, look beyond the cabin size and investigate the guide-to-guest ratio and the specific expertise of the staff. Some expedition lines, like National Geographic-Lindblad, place certified photo instructors and field scientists on every sailing. The opportunity to receive daily, personalized feedback from a professional photographer in such a dynamic environment can be far more valuable than any onboard luxury. The choice ultimately comes down to whether you seek a comfortable base for your photographic pursuits or an intensive, skill-building expedition.
A comparative analysis of the market shows a clear distinction between the two styles. This data, drawn from a guide comparing polar expedition cruises, helps clarify the trade-offs involved in your decision.
| Criteria | Luxury Expedition Ship | Adventure-Focused Ship |
|---|---|---|
| Ships | Sleek design, fewer passengers (150-200) | Smaller, rugged, built for adventure |
| Cabins | Spacious, often with private balconies | Functional and cozy |
| Dining | Gourmet meals paired with fine wines | Tasty and hearty, no sommelier |
| Onboard Extras | Spas, gyms, heated pools | Focus on time ashore rather than amenities |
Now that you are equipped with the technical knowledge and strategic mindset to master Patagonia’s challenges, the next step is to begin planning the expedition that will bring you face-to-face with these icy giants. Choose your season, select your gear with purpose, and decide on the mode of travel that best fits your photographic ambitions.